Year 10+ Plane Geometry
Chapters
Using a Set Square and Ruler (1a)
Using a Set Square and Ruler (1a)
Have you ever opened a geometry set and wondered what all the bits and pieces were for? I used to wonder why we had set squares for measuring \(30^\circ\), \(60^\circ\) and \(45^\circ\) angles, when we had a perfectly good protractor that could do the same job, and much more. Most of the time, I just used them for ruling straight lines.
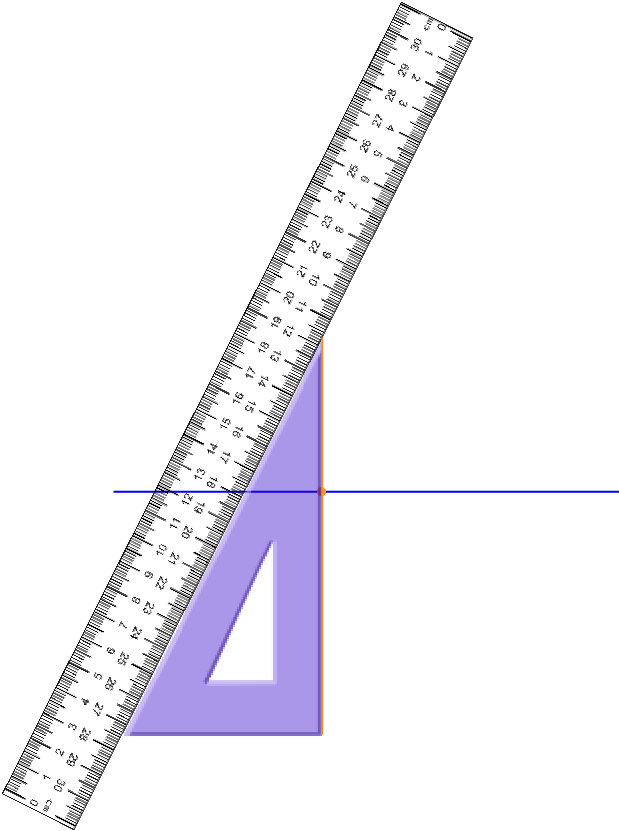
In this article, we're going to look at some uses for a set square to construct parallel and perpendicular lines. You'll also need a ruler for these constructions. If you haven't lost it (like Sam), you'll find a ruler in your geometry kit.
Constructing a Line Through a Given Point, Parallel to Another Line
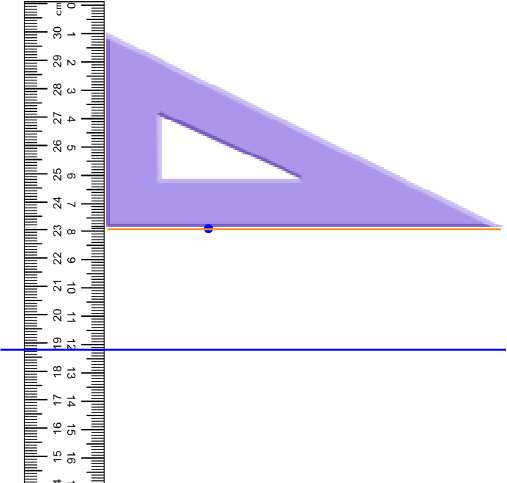
Step 1: If you haven't already been given them, draw the line segment and the point that you want your parallel line to pass through.
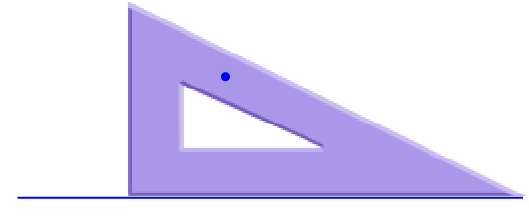
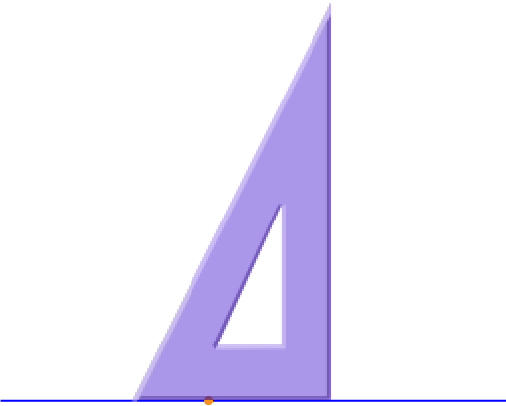
Step 2: Place one of the shorter sides of the set square along your line so that it covers the point that you want to construct your parallel line through. Make sure the edge of the set square is perfectly in line with the line segment.
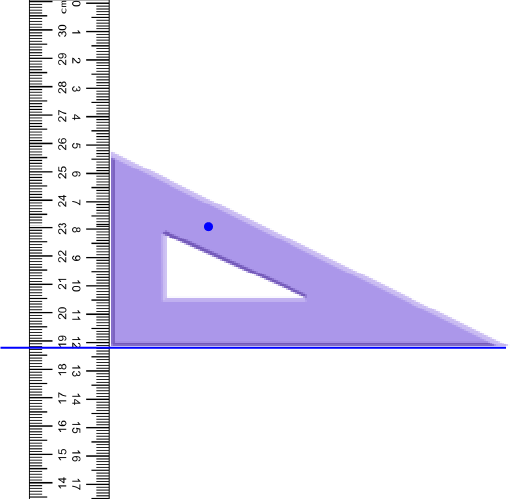
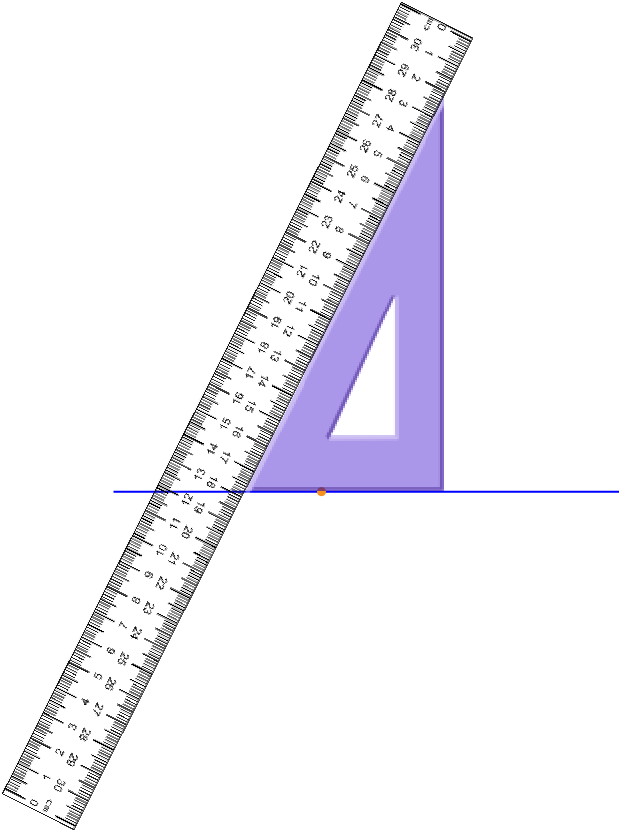
Step 3: Place your ruler against the other short edge of the set square. Make sure there isn't a gap! Your ruler should be at right angles to the original line segment.
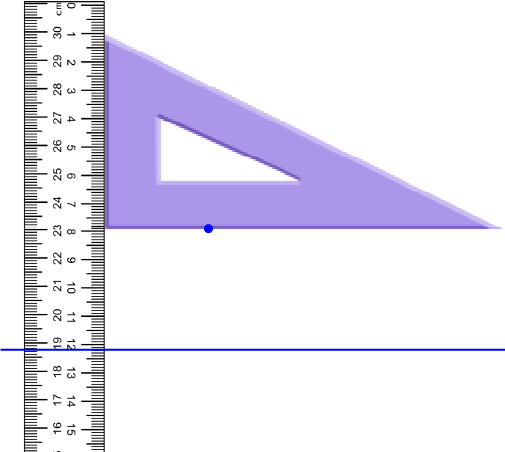
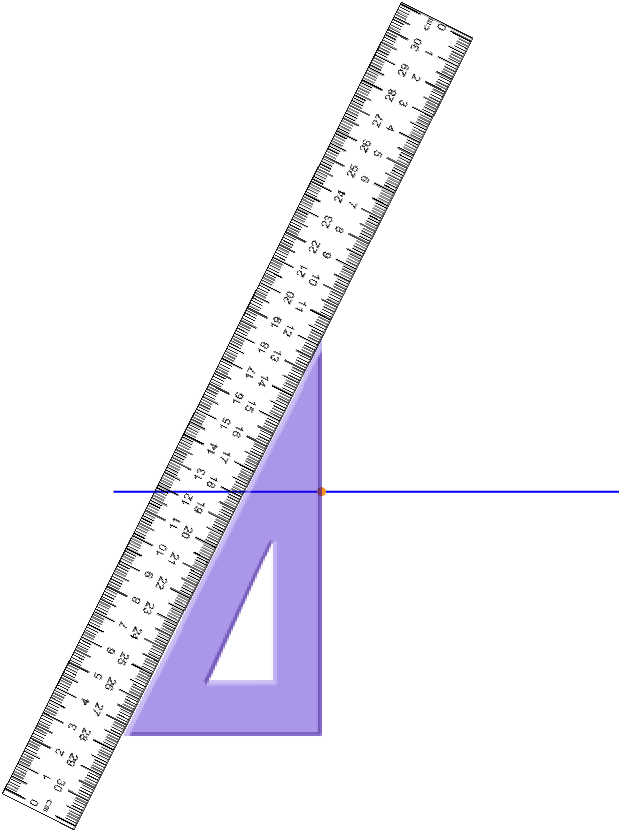
Step 4: Keeping your ruler in place, slide your set square up along the edge of the ruler until the bottom edge (the edge that was in contact with the line segment) touches the point.
Step 5: Using the bottom edge of the set square as a ruler, draw a line segment that passes through the point. It will be parallel to the original line segment.

Constructing a Perpendicular to a Line Through a Given Point on the Line
To do this construction you can either
- Draw your line and mark your point.
- Place one of the edges of the set square on the line, with the right angled corner exactly on the point.
- Draw a line down the other short edge (or line your ruler up with the other short edge, remove the set square) and draw a line.

Step 1: If you haven't already been given them, draw the line segment and the point on the line that you want your perpendicular line to pass through.
Step 2: Place one of the shorter sides of the set square along your line so that it covers the point at which you want to construct your perpendicular line. Make sure the edge of the set square is perfectly in line with the line segment.
Step 3: Place your ruler against the longest edge of the set square. Make sure there isn't a gap!
Step 4: Keeping your ruler in place, slide your set square along the edge of the ruler until one of the short edges passes through the marked point on the line segment.
Step 5: Using the edge of the set square that passes through the point, draw a line segment that passes through the point. It will be perpendicular to the original line segment.

Conclusion
So, there really are some uses for those set squares in your geometry kit, apart from as spare rulers or bookmarks for your maths text! Have fun trying the constructions in this article. When you've mastered them, it'll be time to move on and learn about some of the uses of the pair of compasses, other than for drawing circles. You can read about some geometric constructions using a compass and straight edge in some of the other articles. A good place to start is by learning to bisect an angle.
Description
In these chapters you will learn about plane geometry topics such as
- Area (Irregular polygons, plane shapes etc)
- Perimeter
- Conic sections (Circle, Ellipse, Hyperbola etc)
- Polygons (Congruent, polygons, similar, triangles etc)
- Transformations and symmetry (Reflection, symmetry, transformations etc)
etc
Even though these chapters are marked for Year 10 or higher students, several topics are for students in Year 8 or higher
Audience
Year 10 or higher, suitable for Year 8 + students as well.
Learning Objectives
Learn about Plane Geometry
Author: Subject Coach
Added on: 28th Sep 2018
You must be logged in as Student to ask a Question.
None just yet!