Getting started with Selenium
Chapters
Test design techniques
There are many components involved in designing the tests.
The important components for designing a framework are:
- Page Object Model
- Parameterizing using Excel
- Log4j Logging
- Exception Handling
- Multi Browser Testing
- Capture Screenshots
- Capture Videos
Page Object Model (POM):
What is Page Object Model?
- Page Object Model is a design pattern which is used to create Object Repository for UI elements of web page.
- In this model, for each web page there should be corresponding page class.
- Page class will find the WebElements and also contains Page methods to perform operations on WebElements.
Advantages of POM
- Page Object Patten defines that operations and flows in the UI should be separated from verification. This concept makes code clean and easy to understand.
- The object repository is independent of test cases, so the same object repository can be used for a different purpose and also it supports for different tools.
- Because of the reusable page methods in the POM classes the code becomes less and optimized
- Methods should have realistic names which makes easy to map the operation happening in UI.
POM (Page Object Model) Flow Diagram:
To understand POM, check this diagram

As an example we will use our example site xe.com again, and target 2 pages and try to see if default value of an input box is something that is expected by default or not
First we declare a class with methods to browse and track elements we are interested in on our example site
import org.openqa.selenium.*;
public class ExPageObjects {
	private static WebElement element = null;
	public static WebElement currencyConverterLink(WebDriver driver)
    {
      element = driver.findElement(By.xpath(".//*[@id='footerContent']/ul[1]/li[2]/a"));
      return element;
    }
    // Link click for historical currency tables
    public static WebElement historicalCurrencyTables(WebDriver driver)
    {
      element = driver.findElement(By.xpath(".//*[@id='footerContent']/ul[1]/li[5]/a"));
      return element;
    }

    // currency converter page default amount value
    public static WebElement defaultAmountValue(WebDriver driver) {
    	element = driver.findElement(By.xpath(".//*[@id='amount']"));
        return element;
    }

    // historical currency table default date
    public static WebElement defaultDateValue(WebDriver driver) {
    	element = driver.findElement(By.xpath(".//*[@id='ratesDate']"));
        return element;
    }
}
We are targetting two pages, one is currency converter and another is historical currency tables. Both the links are available in footer.
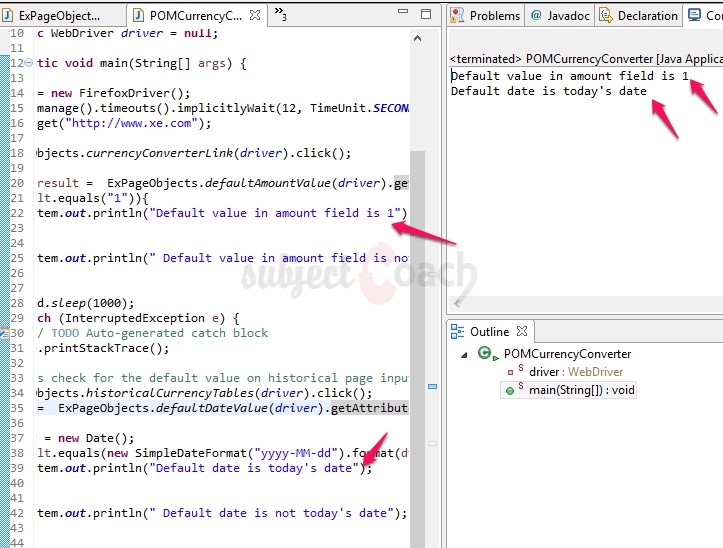
Now we can write our tester function that will utilize above method library to get to the results
import java.text.SimpleDateFormat;
import java.util.Date;
import java.util.concurrent.TimeUnit;

import org.openqa.selenium.WebDriver;
import org.openqa.selenium.firefox.FirefoxDriver;;

public class POMCurrencyConverter {

	private static WebDriver driver = null;

	   public static void main(String[] args) {

	      driver = new FirefoxDriver();
	      driver.manage().timeouts().implicitlyWait(12, TimeUnit.SECONDS);
	      driver.get("http://www.xe.com");

	      ExPageObjects.currencyConverterLink(driver).click();

	      String result =  ExPageObjects.defaultAmountValue(driver).getAttribute("value");
	      if(result.equals("1")){
	    	  System.out.println("Default value in amount field is 1");
          }
	      else {
	    	  System.out.println(" Default value in amount field is not 1");
          }
	      try {
			Thread.sleep(1000);
			} catch (InterruptedException e) {
				// TODO Auto-generated catch block
				e.printStackTrace();
			}
	      // Let's check for the default value on historical page input box now
	      ExPageObjects.historicalCurrencyTables(driver).click();
	      result =  ExPageObjects.defaultDateValue(driver).getAttribute("value");

	      Date dt = new Date();
	      if(result.equals(new SimpleDateFormat("yyyy-MM-dd").format(dt))){
	    	  System.out.println("Default date is today's date");
          }
	      else {
	    	  System.out.println(" Default date is not today's date");
          }


	      driver.close();
	   }
}
When we execute above test, this is what gets displayed.
Data Driven using Excel:
We frequently create a file, open it & update something or delete it. Similar way we need a process to manipulate files using Selenium. To read or write an Excel, Apache provide a library POI. This library is capable to read and write both XLS and XLSX file format of excel.
To download the latest version POI jars:
Step 1: Go to URL: http://poi.apache.org/download.html and click on latest version of POI.
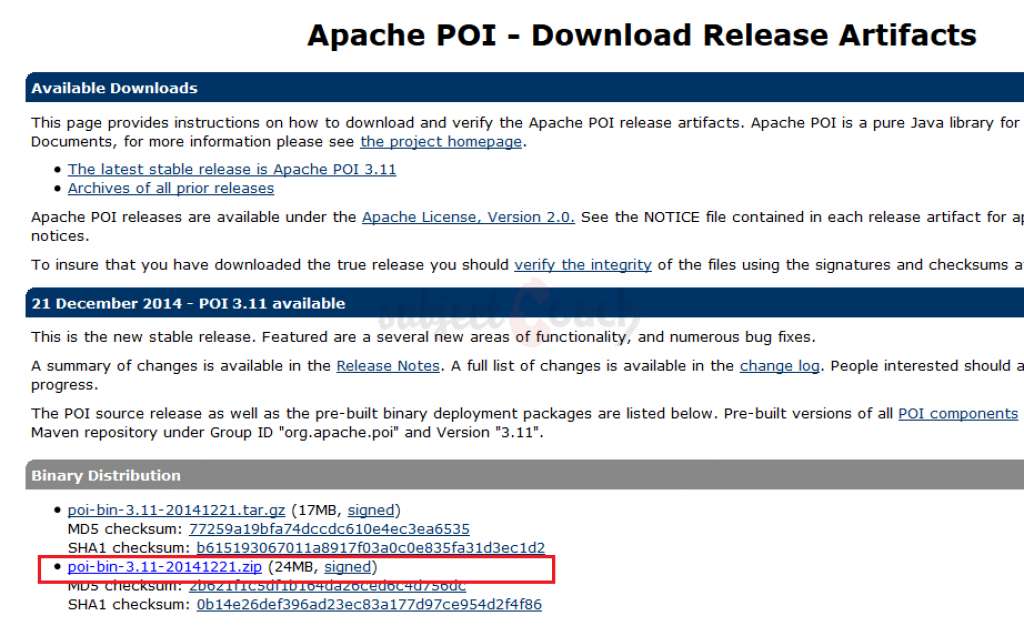
Step 2: Click on the above highlighted link and then choose any mirror to download the POI file from.
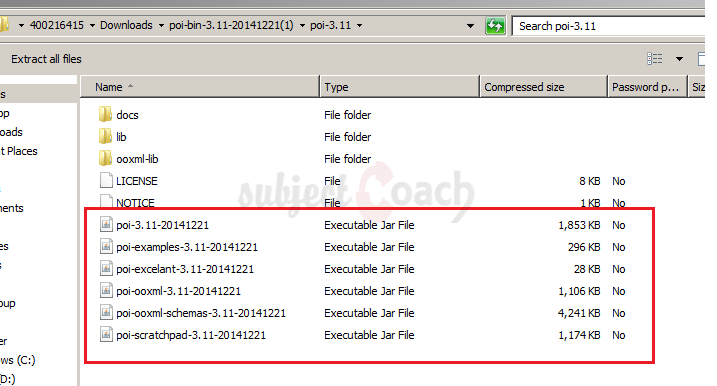
Step 3: Once downloaded Unzip the archive, you will see something like this
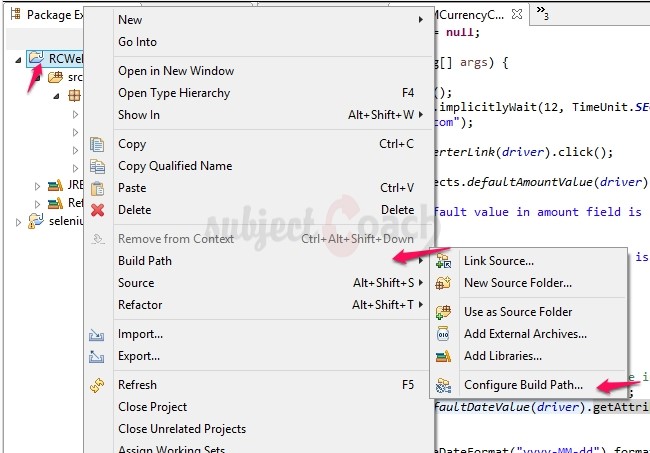
Let's now add POI jar files to our project
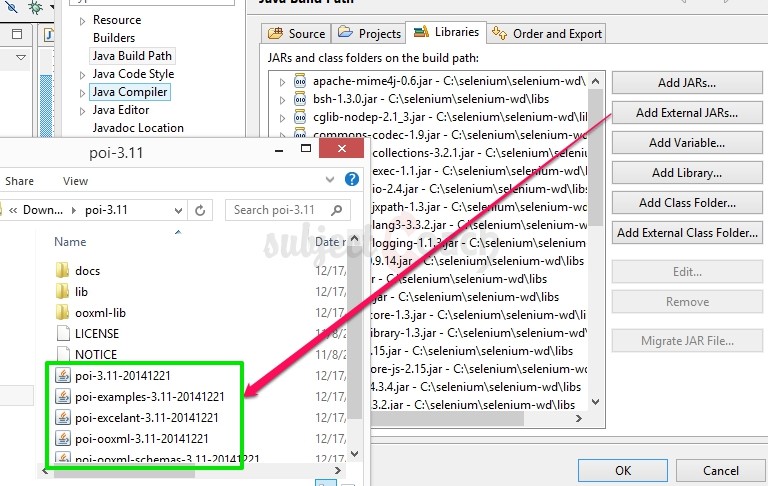
Step 4: Right click on project, select “Build Path” then select “Configure Build path” to add the External JARs files.
Step 5: To add all the 'External JARs', click on project, select “Add External JARs…” then select “JAR Files”.
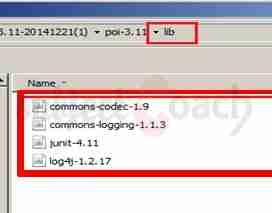
Step 6: Also add all jar files under lib folder of extracted poi folder too
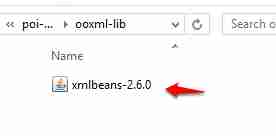
Step 7: Also add all jar files under ooxml-lib folder too
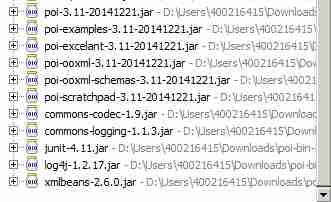
Step 8: Check if added refrences has been added correctly under referenced libraries under our project folder.
Parameterization:
For demonstration, we will parameterize the percent calculator test.
Step 1: Here we will parameterize the all necessary data/inputs for percent calculator operation using Excel as shown.
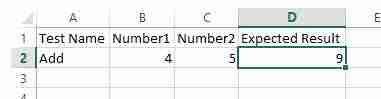
Step 2: By using generic methods we can access the Excel file using the imported JARs. Now we are creating necessary generic methods which help to get a specific cell data or to set a cell data etc.
import java.io.*;
import org.apache.poi.xssf.usermodel.*;

public class ExcelOB {

   private XSSFSheet excelSheet;
   private XSSFWorkbook excelWBook;

   public ExcelOB(String filePath, String sheetName) throws Exception {
      try {
         FileInputStream ExcelFile = new FileInputStream(filePath);
         excelWBook = new XSSFWorkbook(ExcelFile);
         excelSheet = excelWBook.getSheet(sheetName);
      }
      catch (Exception exp){
         throw (exp);
         }
      }

   public int getRows() throws Exception {
   //Handling exception
      try{
         return excelSheet.getPhysicalNumberOfRows();
      }
      catch (Exception e){
         throw (e);
      }
   }

   public String getCellValueAsString(int row, int col) throws Exception {
   //Handling exception
      try {
         String CellData = excelSheet.getRow(row).getCell(col).getStringCellValue();
         return CellData;
      }
      catch (Exception e) {
         return "Cell Data cannot be extracted";
      }
   }

   public double getCellDataAsDouble(int row, int col) throws Exception {
   //Handling exception
      try {
         double CellData = excelSheet.getRow(row).getCell(col).getNumericCellValue();
         return CellData;
      }
      catch (Exception e){
         return 0.00;
         }
      }
   }
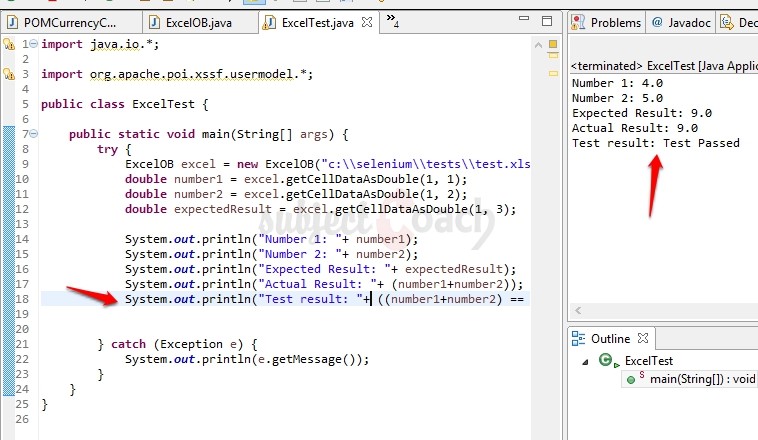
Step 3: To access the created Excel methods, we need another tester class with main method as shown below
import java.io.*;

import org.apache.poi.xssf.usermodel.*;

public class ExcelTest {

	public static void main(String[] args) {
		try {
			ExcelOB excel = new ExcelOB("c:\\selenium\\tests\\test.xlsx", "Sheet1");
			double number1 = excel.getCellDataAsDouble(1, 1);
			double number2 = excel.getCellDataAsDouble(1, 2);
			double expectedResult = excel.getCellDataAsDouble(1, 3);

			System.out.println("Number 1: "+ number1);
			System.out.println("Number 2: "+ number2);
			System.out.println("Expected Result: "+ expectedResult);
			System.out.println("Actual Result: "+ (number1+number2));
			System.out.println("Test result: "+ ((number1+number2) == expectedResult? "Test Passed" :"Test Failed"));


		} catch (Exception e) {
			System.out.println(e.getMessage());
		}
	}
}
Result: Above will produce results as shown below
Log4j Logging:
Logging is an important part of programming that supports for advanced debugging facilities and structured organization of information recorded at the execution time.
It provides an effective process to track the errors that occurs in the application, after the deploy process; it is helpful to understand what went wrong with application.
Main components of Log4j:
- Loggers: Used to capture the logging information
- Appenders: using appenders we can inform the system on where to log the information.
- Layouts: Enables to specify the format style of logging information.
Log level methods used for logging the messages are:
- error
- warn
- info
- debug
- log
Example:
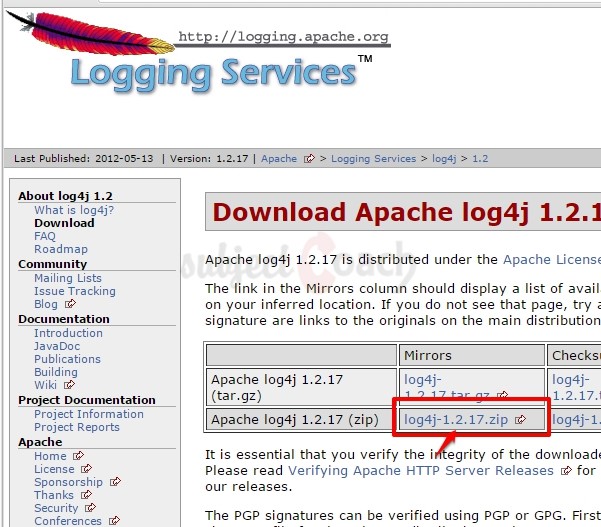
Step 1: To download log4j JAR file Follow the URL: https://logging.apache.org/log4j/1.2/download.html.
Step 2: Add log4j-x.x.x.jar to you build path libraries.
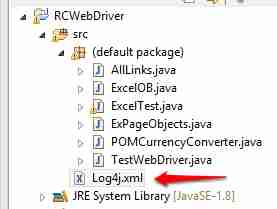
Step 3: Let's add our configuration to Lot4j.xml which you can create by visiting File > New > File and name it Log4j.xml. Folder structure is shown below
Paste the following code in Log4j.xml file
<?xml version="1.0" encoding="UTF-8"?><!DOCTYPE log4j:configuration SYSTEM "log4j.dtd"><log4j:configuration xmlns:log4j="http://jakarta.apache.org/log4j/" debug="false"><appender name="fileAppender" class="org.apache.log4j.FileAppender"><param name="Threshold" value="INFO" /><param name="File" value="logs.log"/><layout class="org.apache.log4j.PatternLayout"><param name="ConversionPattern" value="%d %-5p [%c{1}] %m %n" /></layout></appender><root><level value="INFO"/><appender-ref ref="fileAppender"/></root></log4j:configuration>
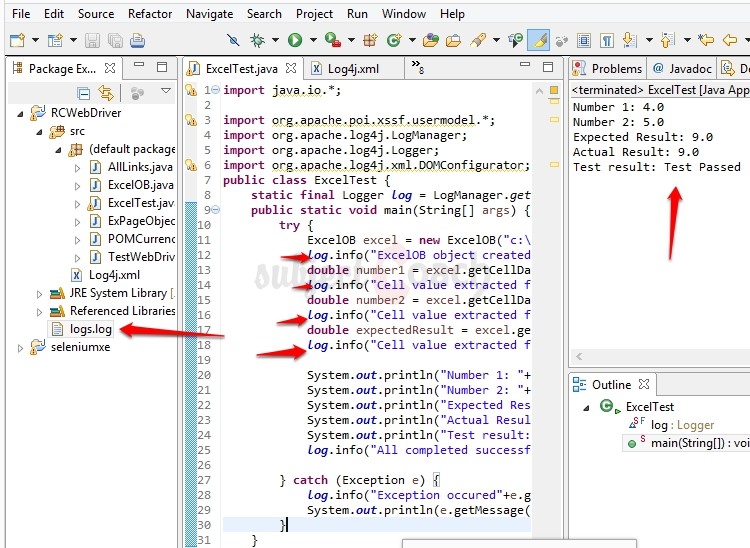
Now let's update our previous Excel test to have logging information enabled as shown below
import java.io.*;
import org.apache.poi.xssf.usermodel.*;
import org.apache.log4j.LogManager;
import org.apache.log4j.Logger;
import org.apache.log4j.xml.DOMConfigurator;
public class ExcelTest {
	static final Logger log = LogManager.getLogger(ExcelTest.class.getName());
	public static void main(String[] args) {
		try {
			ExcelOB excel = new ExcelOB("c:\\selenium\\tests\\test.xlsx", "Sheet1");
			log.info("ExcelOB object created..");
			double number1 = excel.getCellDataAsDouble(1, 1);
			log.info("Cell value extracted for row 1 col 1..");
			double number2 = excel.getCellDataAsDouble(1, 2);
			log.info("Cell value extracted for row 1 col 2..");
			double expectedResult = excel.getCellDataAsDouble(1, 3);
			log.info("Cell value extracted for row 1 col 3..");

			System.out.println("Number 1: "+ number1);
			System.out.println("Number 2: "+ number2);
			System.out.println("Expected Result: "+ expectedResult);
			System.out.println("Actual Result: "+ (number1+number2));
			System.out.println("Test result: "+ ((number1+number2) == expectedResult? "Test Passed" :"Test Failed"));
			log.info("All completed successfully..");

		} catch (Exception e) {
			log.info("Exception occured"+e.getMessage());
			System.out.println(e.getMessage());
		}
	}
}
When we execute this test, logs.log file is created in project root and here is all it looks.
Exception Handling
What is Exception Handling?
Exception handling refers to handling the exception thrown by the program at run time. This exception may interrupt the execution process to overcome this scenario we go for exception handling. It is the block of code that processes the exception object.
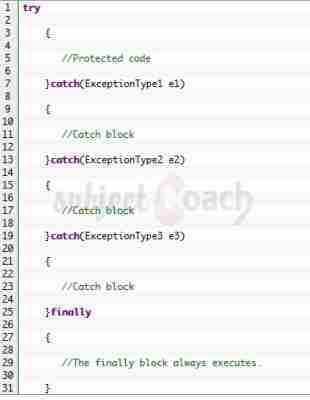
Try is a start of the block and Catch is a block which will be at the end of try block to handle the exceptions occurred.
The syntax for try/catch is as shown:
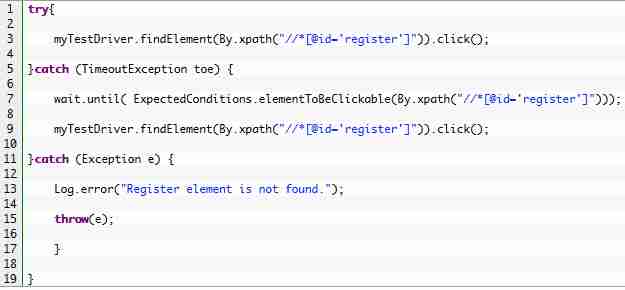
Example: TimeoutException using Selenium WebDriver.
Multi Browser Testing:
Now days, it is required to perform multi-browser testing to check that the functionality is working according to the requirement with every browser.
For Example: In the Selenium Grid example, we had executed the scripts remotely; here we will execute the scripts locally.
Example:
Here we getting default amount value from xe.com currency converter in all modern browsers simultaneously
import org.openqa.selenium.chrome.ChromeDriver;
import org.openqa.selenium.firefox.FirefoxDriver;
import org.openqa.selenium.ie.InternetExplorerDriver;
import java.util.concurrent.TimeUnit;
import org.openqa.selenium.*;
import org.testng.annotations.*;

public class AllBrowsersTest
{
   private WebDriver driver;
   private String URL = "http://www.xe.com";
   @Parameters("browser")
   @BeforeTest
   public void testInBrowsers(String browser)
   {
      if (browser.equalsIgnoreCase("firefox"))
      {
         System.out.println("Testing with Firefox");
         driver = new FirefoxDriver();
         driver.get(URL);
         driver.manage().timeouts().implicitlyWait(10, TimeUnit.SECONDS);
         driver.manage().window().maximize();
      }
      else if (browser.equalsIgnoreCase("chrome"))
      {
         System.out.println("Testing with Chrome");
         System.setProperty("webdriver.chrome.driver", "c:\\selenium\\drivers\\chromedriver.exe");
         driver = new ChromeDriver();
         driver.get(URL);
         driver.manage().timeouts().implicitlyWait(10, TimeUnit.SECONDS);
         driver.manage().window().maximize();
      }
      else if (browser.equalsIgnoreCase("ie"))
      {
         System.out.println("Testing with Internet Explorer");
         System.setProperty("webdriver.ie.driver", "c:\\selenium\\drivers\\IEDriverServer.exe");
         driver = new InternetExplorerDriver();
         driver.get(URL);
         driver.manage().timeouts().implicitlyWait(10, TimeUnit.SECONDS);
         driver.manage().window().maximize();
      }
      else
      {
         throw new IllegalArgumentException("The Browser Type is Undefined");
      }
   }
   @Test
   public void findDefaultAmountFieldValue()
   {
	   WebElement element = driver.findElement(By.xpath(".//*[@id='amount']"));
       String result =  element.getAttribute("value");
	      if(result.equals("1")){
	    	  System.out.println("Default value in amount field is 1");
       }
	      else {
	    	  System.out.println(" Default value in amount field is not 1");
       }
   }
   @AfterTest
   public void closeBrowser()
   {
      driver.close();
   }
}
To define the order of the our tests, we will have to create an XML (testing.xml) file listing the test methods we would like to run. Make sure that the test methods are annotated with @Test, or else the TestNG engine will not invoke them at all.
To run parallel need to mention parallel="tests" as shown.
Here is such XML that we created for our tests
<suite name="XE default value test" verbose="10" parallel="tests"><test name="Test with firefox" preserve-order="true"><parameter name="browser" value="firefox" /><classes><class name="AllBrowsersTest" /></classes></test><test name="Test with chrome" preserve-order="true"><parameter name="browser" value="chrome" /><classes><class name="AllBrowsersTest" /></classes></test><test name="Test with internet explorer" preserve-order="true"><parameter name="browser" value="ie" /><classes><class name="AllBrowsersTest" /></classes></test></suite>
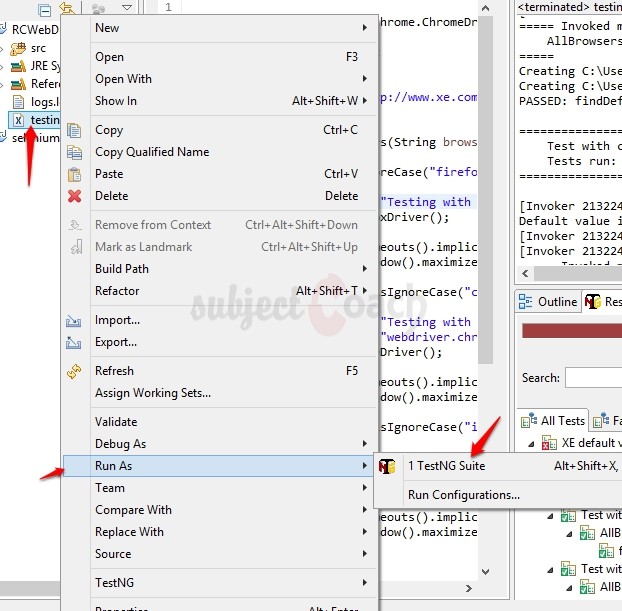
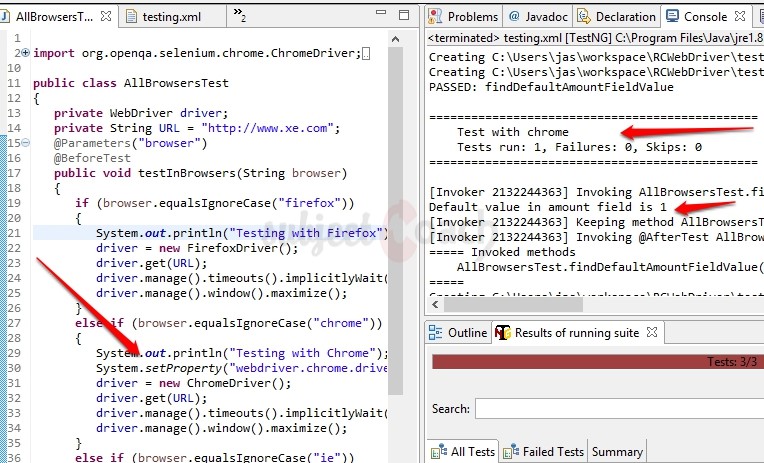
Execute as TestNG Suite as shown below. Please note: you must install TestNG plugin for eclipse IDE before you can run
The browsers (firefox, chrome, internet explorer) will be launched simultaneously and the result will be printed in the console window.
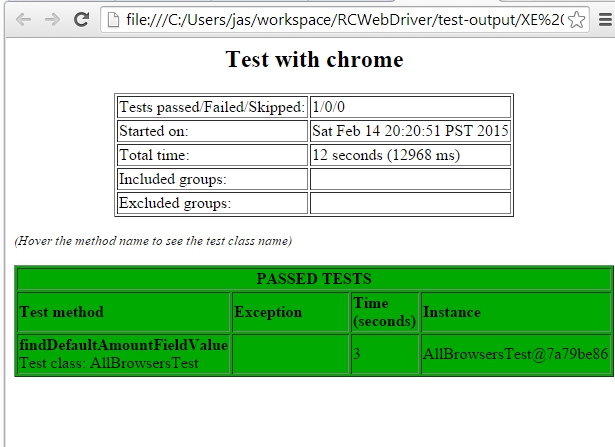
Results:
Test results can also be viewed through stored HTML files as shown below
Capture Screenshots:
While running tests using Selenium Webdriver, there may be some situations to take screenshot for the failed test steps for proper bug reporting. The screenshot can be capture depending on the way designed in the Test Framework, either for all important test steps or just the failed ones etc.
The code below takes the screenshot of the page and saves it to system.
import java.io.File;
import org.apache.commons.io.FileUtils;
import org.openqa.selenium.OutputType;
import org.openqa.selenium.TakesScreenshot;
import org.openqa.selenium.WebDriver;
import org.openqa.selenium.firefox.FirefoxDriver;
public class Screenshots {
        public static void main(String[] args) throws Exception {
        WebDriver driver = new FirefoxDriver();
        driver.get("http://www.xe.com");
        File screenshot = ((TakesScreenshot)driver).getScreenshotAs(OutputType.FILE);

        FileUtils.copyFile(screenshot, new File("c:\\selenium\\tests\\xe_home_screenshot.jpg"));

        System.out.println("XE.com screenshot was successful");
        driver.close();
    }
}
And the captured screenshot will look like this

Capture videos:
We will learn to capture video, because log file or a screenshot are not enough to analyze the failures.
How to capture videos: We will use Monte Media Library to perform this operation.
Get the library first
Step 1: Go to URL: http://www.randelshofer.ch/monte/index.html and download recorder JAR.
Step 2: Add jar file to project libraries as we did with other libraries before
Its time to write a script
import java.awt.*;
import java.io.File;
import org.monte.media.Format;
import org.monte.media.math.Rational;
import org.monte.screenrecorder.ScreenRecorder;
import org.openqa.selenium.By;
import org.openqa.selenium.WebDriver;
import org.openqa.selenium.WebElement;
import org.openqa.selenium.firefox.FirefoxDriver;
import static org.monte.media.AudioFormatKeys.*;
import static org.monte.media.VideoFormatKeys.*;
public class BrowserRecordings {
private ScreenRecorder screenRecorder;
public static void main(String[] args) throws Exception {
BrowserRecordings record = new BrowserRecordings();
record.startRecording();
WebDriver driver = new FirefoxDriver();
driver.get("http://www.google.com");
WebElement element = driver.findElement(By.name("q"));
element.sendKeys("currency converter");
element.submit();
System.out.println("Title of the page is: " +driver.getTitle());
driver.quit();
record.stopRecording();
}
public void startRecording() throws Exception
{
GraphicsConfiguration gc = GraphicsEnvironment
.getLocalGraphicsEnvironment()
.getDefaultScreenDevice()
.getDefaultConfiguration();
this.screenRecorder = new ScreenRecorder(gc,
new Format(MediaTypeKey, MediaType.FILE, MimeTypeKey, MIME_AVI),
new Format(MediaTypeKey, MediaType.VIDEO, EncodingKey, ENCODING_AVI_TECHSMITH_SCREEN_CAPTURE,
CompressorNameKey, ENCODING_AVI_TECHSMITH_SCREEN_CAPTURE,
DepthKey, 24, FrameRateKey, Rational.valueOf(15),
QualityKey, 1.0f,
KeyFrameIntervalKey, 15 * 60),
new Format(MediaTypeKey, MediaType.VIDEO, EncodingKey, "black",
FrameRateKey, Rational.valueOf(30)),
null);
this.screenRecorder.start();
}
public void stopRecording() throws Exception
{
this.screenRecorder.stop();
}
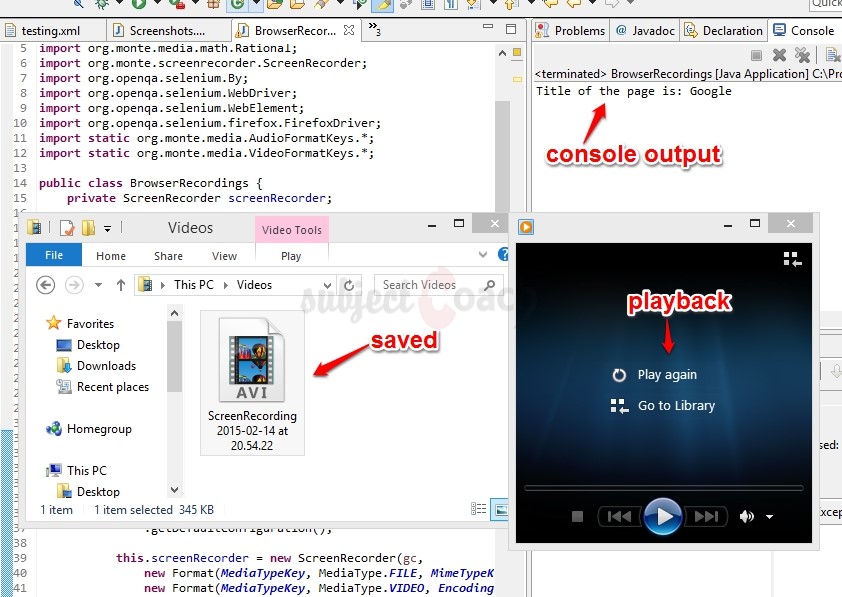
}
After we execute this test script, video file is generated under “Videos” folder of current logged in user as shown below
In next chapter we will learn about TestNG.
Description
This tutorial will get you started with Selenium. This tutorial is subdivided into 11 chapters.
- Overview
- IDE
- Environment Setup
- Remote Control
- Selenese Commands
- Webdriver
- Locators
- User Interactions
- Test design techniques
- TestNG
- Grid
* freelancer contributed
Environment
A PC capable of running selenium
Prerequisites
A basic idea of what Software Testing is.
Audience
People who wish to get started with Selenium
Learning Objectives
You will learn ins and outs of Selenium which includes downloading, installing and using Selenium.
Author: Subject Coach
Added on: 10th Feb 2015
You must be logged in as Student to ask a Question.
None just yet!