Getting started with Selenium
Chapters
Selenium Grid
Selenium Grid is a tool of Selenium Suite which is used to run multiple tests across various browsers, operating systems in parallel. It accelerates the testing process across browsers and across platforms by giving quick and accurate feedback. Hence it reduces the time, and the cost for testing in various browsers under multiple operation systems.
Selenium Grid has:
- Hub and
- Node.
- Hub:
- It is central point where we load tests into.
- There will be only one hub in a grid allowed.
- It can be launched only on a single machine.
- Node:
- These are the Selenium instances that will execute the tests that loaded on the hub.
- Multiple nodes in a grid are allowed.
- These nodes will be launched on multiple machines with different platforms/ browsers.
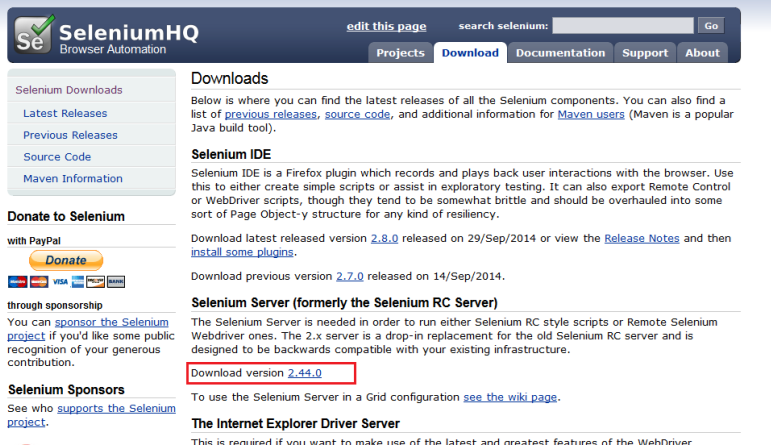
- Step 1: To download Selenium Server standalone JAR file go to http://docs.seleniumhq.org/download/.Click on the version as shown below.
Configuring the Hub:
- Step 1: To download Selenium Server standalone JAR file go to http://docs.seleniumhq.org/download/.Click on the version as shown below.
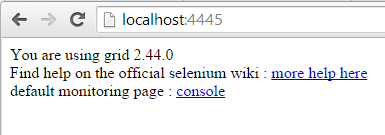
- Step 2: Launching the Selenium Server using the following command to start the hub. Now we will use the port '4445' to start the hub.

Note: Ensure that there are no other applications that are running on port# 4445
- Step 3: Go to the URL http://localhost:4445
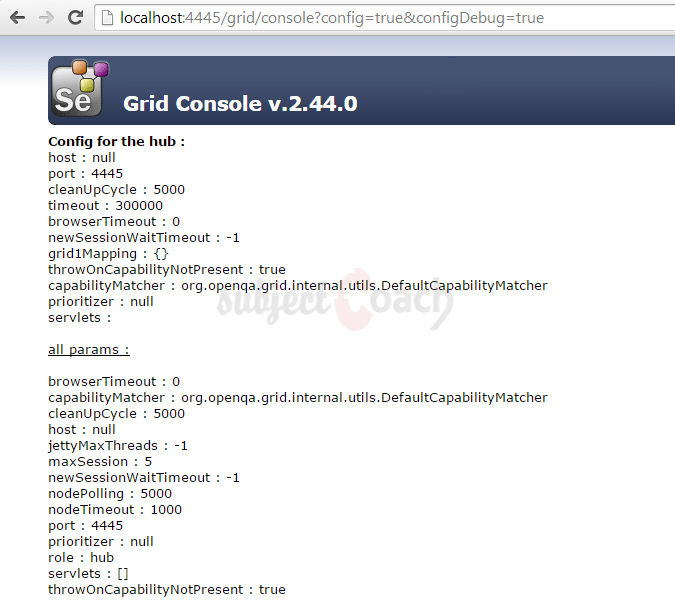
- Step 4: Click on console link and then click on View Config link, we will get the screen below
Configuring the Nodes:
- Step 1: Logon to the node, where you would like to execute the scripts and we need to point to the selenium-server-standalone JAR while launching the nodes. Hence place the 'selenium-server-standalone-2.42.2' in a folder.
- Step 2: To launch FireFox Node use the below command.
java -jar c:\selenium\selenium-server-standalone-2.44.0.jar -role node -hub http://192.168.1.164:4445/grid/register -browser browserName=firefox -port 5555
Where,
- c:\selenium\selenium-server-standalone-2.44.0.jar is the Location of the Selenium Server Standalone Jar File(on the Node Machine)
- http://192.168.1.164:4445 = IP Address of the Hub and
- 4445 is the port of the Hub
- browserName = firefox (Parameter to specify the Browser name on Nodes)
- 5555 = Port on which Firefox Node would be up and running.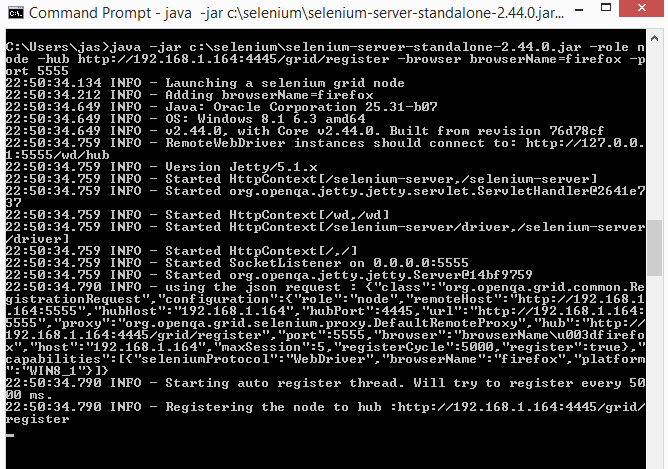
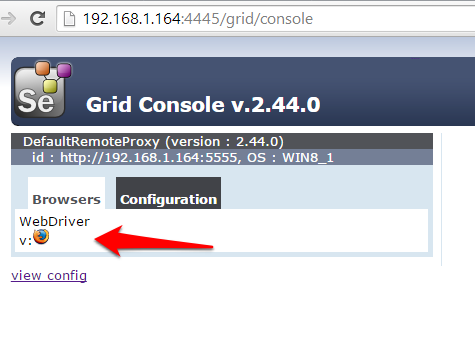
- Step 3: Goto your configured URL, In our case its http://192.168.1.164:4445 and the Hub will be now display the node attached to it.
- Step 4: Download the Internet Explorer driver: follow the URL http://docs.seleniumhq.org/download/ ,click appropriate file based on the architecture of your OS to download. The downloaded file will be in zip format, unzip it and place in it a folder which has to be referred while launching IE nodes.
- Step 5: To launch Internet Explorer using the below command.
java -Dwebdriver.ie.driver=c:\selenium\drivers\IEDriverServer.exe -jar c:\selenium\selenium-server-standalone-2.44.0.jar -role node -hub http://192.168.1.164:4445/grid/register -browser browserName=ie -port 5556
Where,
- c:\selenium\selenium-server-standalone-2.44.0.jar is the Location of the Selenium Server Standalone Jar File(on the Node Machine)
- http://192.168.1.164:4445 = IP Address of the Hub and
- 4445 is the port of the Hub
- browserName = ie (Parameter to specify the Browser name on Nodes)
- 5556 = Port on which Internet Explorer Node would be up and running.
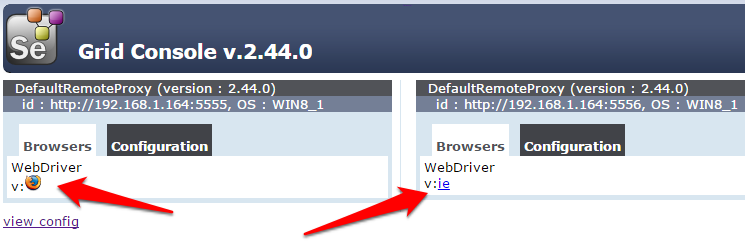
- Step 6: When you go back and refresh the hub page you will see the IE node now as shown below
- Step 7: For launching the Chrome Node, we need to have the Chrome driver downloaded on the node machine. Now will download the Chrome Driver, Go to http://docs.seleniumhq.org/download/ , now navigate to Third Party Browser Drivers area and click on the version number '2.14'.
Once download process is done, unzip the file and place it in a folder which has to be referred while launching chrome nodes. - Step 8: To launch Chrome by using the following command.
java -Dwebdriver.chrome.driver=c:\selenium\drivers\chromedriver.exe -jar c:\selenium\selenium-server-standalone-2.44.0.jar -role node -hub http://192.168.1.164:4445/grid/register -browser browserName=chrome -port 5557
Where,
- c:\selenium\selenium-server-standalone-2.44.0.jar is the Location of the Selenium Server Standalone Jar File(on the Node Machine)
- http://192.168.1.164:4445 = IP Address of the Hub and
- 4445 is the port of the Hub
- browserName = chrome (Parameter to specify the Browser name on Nodes)
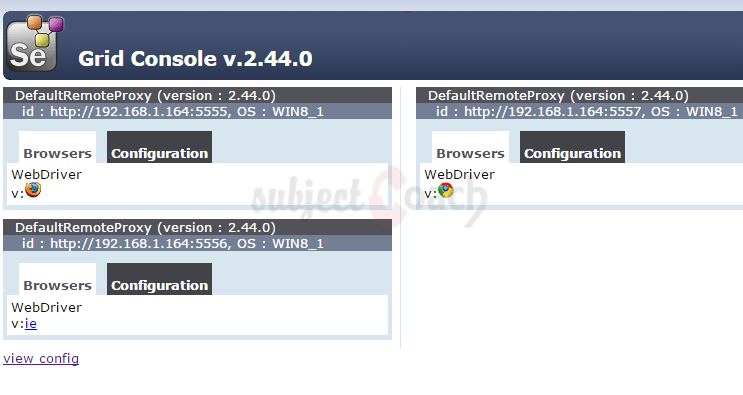
- 5557 = Port on which Chrome Node would be up and running. - When you refresh the hub page, you will now see the chrome node as shown below
We can use the previous TestNG test as shown below
Example from previous chapter:
Here we getting default amount value from xe.com currency converter in all modern browsers simultaneously
package TestNG;
import org.openqa.selenium.chrome.ChromeDriver;
import org.openqa.selenium.firefox.FirefoxDriver;
import org.openqa.selenium.ie.InternetExplorerDriver;
import java.util.concurrent.TimeUnit;
import org.openqa.selenium.*;
import org.testng.annotations.*;

public class AllBrowsersTest
{
   private WebDriver driver;
   private String URL = "http://www.xe.com";
   @Parameters("browser")
   @BeforeTest
   public void testInBrowsers(String browser)
   {
      if (browser.equalsIgnoreCase("firefox"))
      {
         System.out.println("Testing with Firefox");
         driver = new FirefoxDriver();
         driver.get(URL);
         driver.manage().timeouts().implicitlyWait(10, TimeUnit.SECONDS);
         driver.manage().window().maximize();
      }
      else if (browser.equalsIgnoreCase("chrome"))
      {
         System.out.println("Testing with Chrome");
         System.setProperty("webdriver.chrome.driver", "c:\\selenium\\drivers\\chromedriver.exe");
         driver = new ChromeDriver();
         driver.get(URL);
         driver.manage().timeouts().implicitlyWait(10, TimeUnit.SECONDS);
         driver.manage().window().maximize();
      }
      else if (browser.equalsIgnoreCase("ie"))
      {
         System.out.println("Testing with Internet Explorer");
         System.setProperty("webdriver.ie.driver", "c:\\selenium\\drivers\\IEDriverServer.exe");
         driver = new InternetExplorerDriver();
         driver.get(URL);
         driver.manage().timeouts().implicitlyWait(10, TimeUnit.SECONDS);
         driver.manage().window().maximize();
      }
      else
      {
         throw new IllegalArgumentException("The Browser Type is Undefined");
      }
   }
   @Test
   public void findDefaultAmountFieldValue()
   {
	   WebElement element = driver.findElement(By.xpath(".//*[@id='amount']"));
       String result =  element.getAttribute("value");
	      if(result.equals("1")){
	    	  System.out.println("Default value in amount field is 1");
       }
	      else {
	    	  System.out.println(" Default value in amount field is not 1");
       }
   }
   @AfterTest
   public void closeBrowser()
   {
      driver.close();
   }
}
To define the order of the our tests, we will have to create an XML (testing.xml) file listing the test methods we would like to run. Make sure that the test methods are annotated with @Test, or else the TestNG engine will not invoke them at all.
To run parallel need to mention parallel="tests" as shown.
Here is such XML that we created for our tests
<suite name="XE default value test" verbose="10" parallel="tests"><test name="Test with firefox" preserve-order="true"><parameter name="browser" value="firefox" /><classes><class name="AllBrowsersTest" /></classes></test><test name="Test with chrome" preserve-order="true"><parameter name="browser" value="chrome" /><classes><class name="AllBrowsersTest" /></classes></test><test name="Test with internet explorer" preserve-order="true"><parameter name="browser" value="ie" /><classes><class name="AllBrowsersTest" /></classes></test></suite>
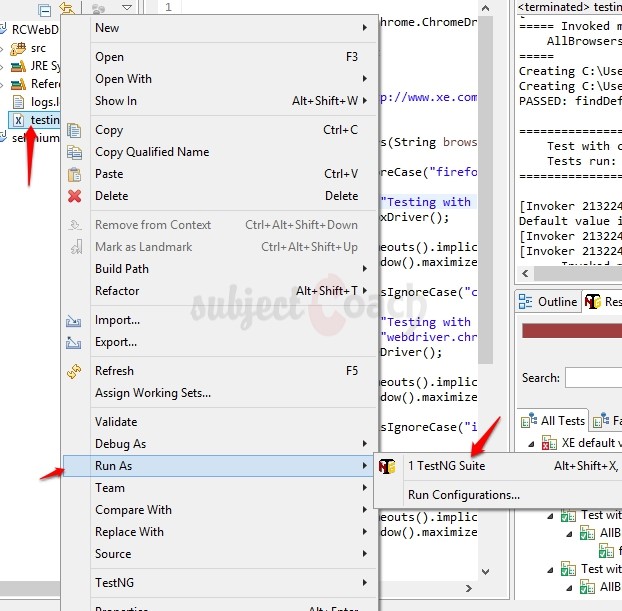
How to execute our test script?
Execute as TestNG Suite as shown below. Please note: you must install TestNG plugin for eclipse IDE before you can run
The browsers (firefox, chrome, internet explorer) will be launched simultaneously and the result will be printed in the console window.
Results:
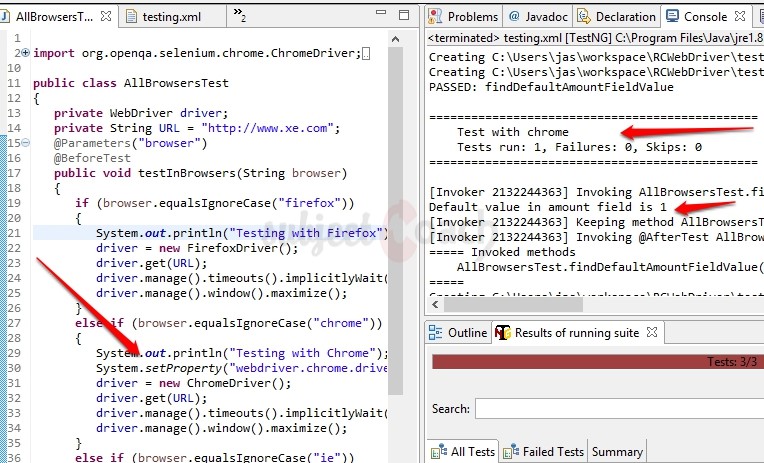
TestNG also outputs HTML and XML files, which you are able to open in a browser to analyze your results.
You can see that our test browsers are running our tests parallely as shown below
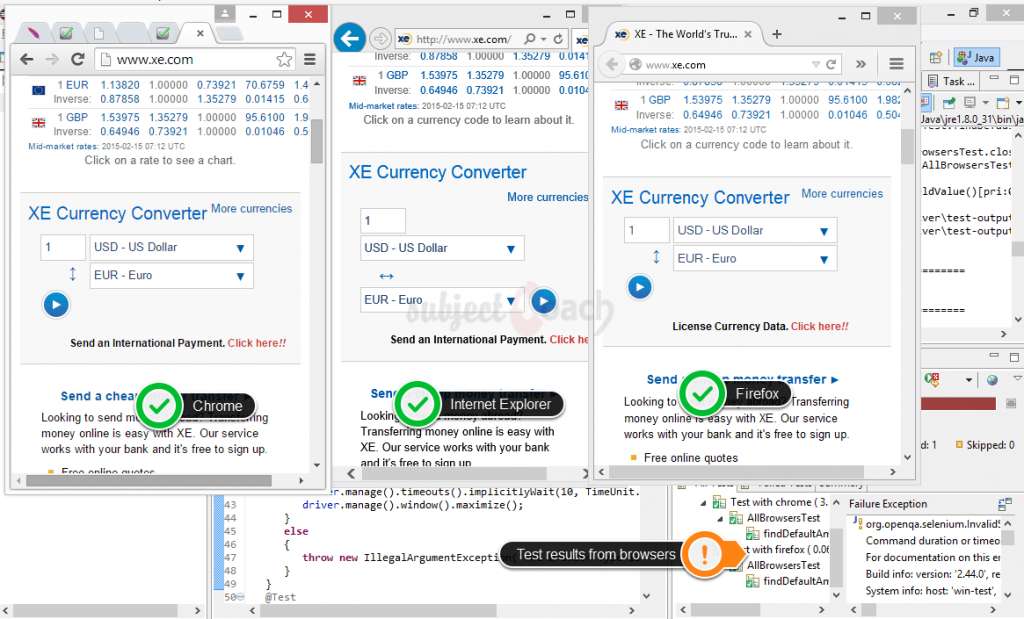
Go to the 'Results of Running Suite' Tab and TestNG will be display the result summary as shown above in organge sticker.
We can also explore the HTML results as shown below

This is it in our Selenium Series. We hope that you enjoyed and learned a fair bit from it. Thanks for all the feedback. Some examples has been updated because of that.
Description
This tutorial will get you started with Selenium. This tutorial is subdivided into 11 chapters.
- Overview
- IDE
- Environment Setup
- Remote Control
- Selenese Commands
- Webdriver
- Locators
- User Interactions
- Test design techniques
- TestNG
- Grid
* freelancer contributed
Environment
A PC capable of running selenium
Prerequisites
A basic idea of what Software Testing is.
Audience
People who wish to get started with Selenium
Learning Objectives
You will learn ins and outs of Selenium which includes downloading, installing and using Selenium.
Author: Subject Coach
Added on: 10th Feb 2015
You must be logged in as Student to ask a Question.
None just yet!