Getting started with Selenium
Chapters
Setting up Environment for Selenium
Initial configuration needed to develop Selenium RC or WebDriver scripts. To set up the environment follow below steps:
- Download and Install Java
- Download and Configure Eclipse
- Configure FireBug and FirePath
- Configure Selenium RC
- Configure Selenium WebDriver
Download and Install Java:
Let us see how to download JDK (Java Development Kit) and install Java.
- Step 1: Go to the URL:
http://www.oracle.com/technetwork/java/javase/downloads/index.html, we are in “Downloads”, now click on “JDK Download” as shown below: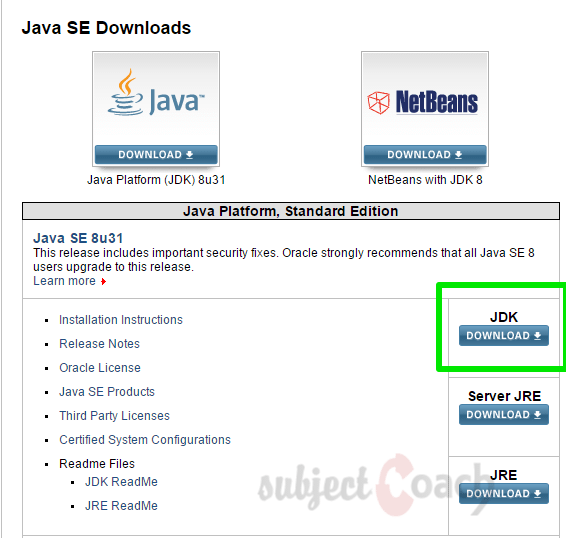
- Click on "Accept License Agreement" radio button.
- Now click the appropriate link and save the .exe file to disk.
- Run the downloaded installer
- Click Next button
- By default the features “Development Tools” is selected, click 'Next'.
- The installation progress bar is shown.
- Select the location for installation and click 'Next'.
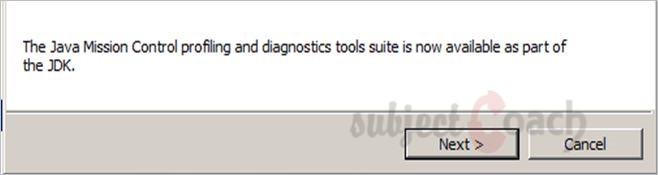
- Once the installer installs the JDK and new files are copied.
- After the successful installation displays the below message to the user. Click on close.
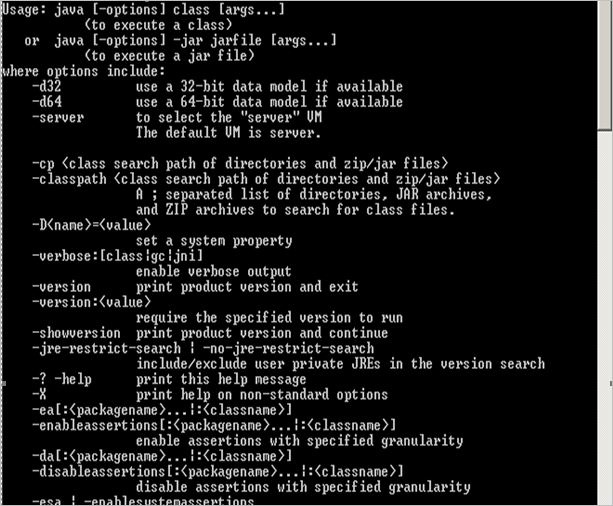
- Now Navigate to the command prompt and just type 'java' as a command. The output of the command is shown below or else installation is unsuccessful and it will throw an "unknown command" error
Download and Configure Eclipse:
To Download and Configure Eclipse follow below steps:
Step 1: follow the URL: http://www.eclipse.org/downloads/and download the appropriate file based on OS architecture.
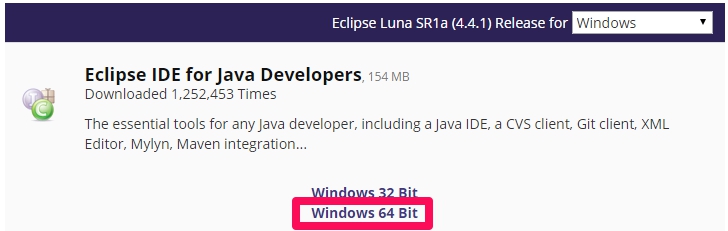
Step 2: Click on 'Download' link as shown below based on if windows is 32 or 64 bit.
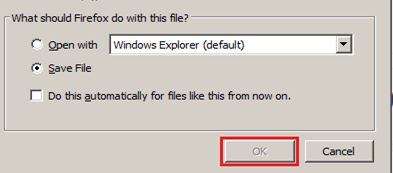
Step 3: Select “Save File” and Click on 'OK' button as shown below.
Step 4: The download file will be in a Zipped format. Unzip the file.
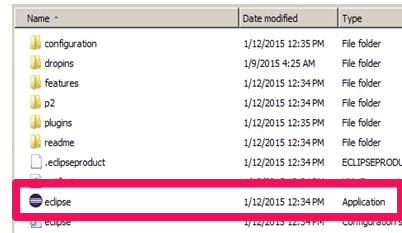
Step 5: Go to “eclipse” folder and locate Eclipse.exe and double click on the file.
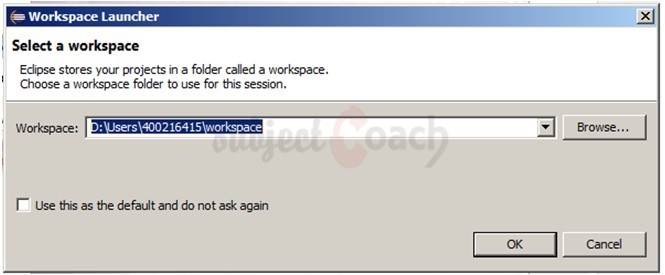
Step 6: Select the folder location where the development has to take place.
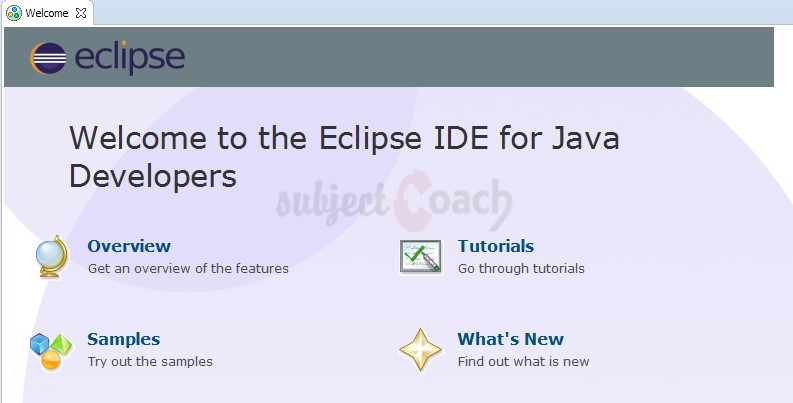
Step 7: The Eclipse window opens.
Configure FireBug and FirePath:
We need to locate elements based on their XPath using their attributes like name/id etc. Before start working with Selenium RC or WebDriver.
To locate an element, we need plugins.
Step 1: Follow the URL: https://addons.mozilla.org/en-US/firefox/addon/firebug/and download plugin.
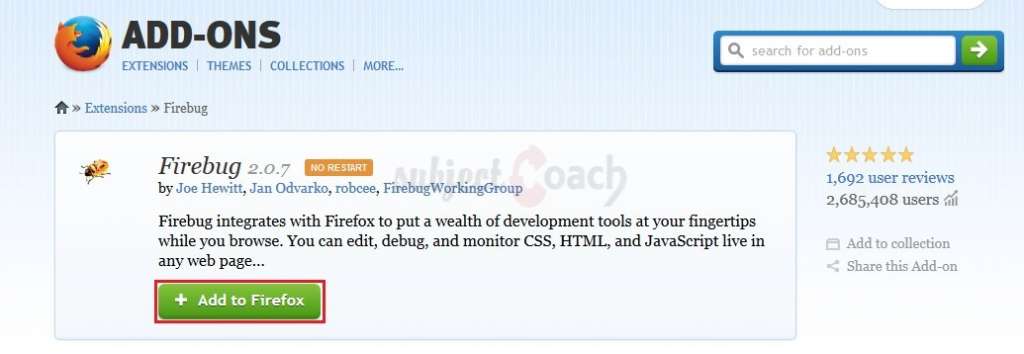
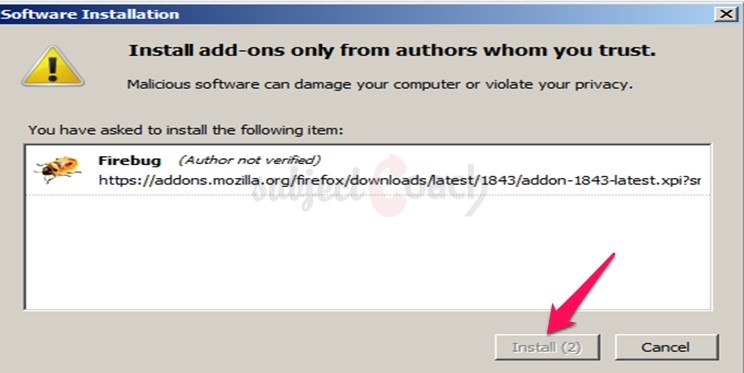
Step 2: The add-on installer is shown and click “Install” button
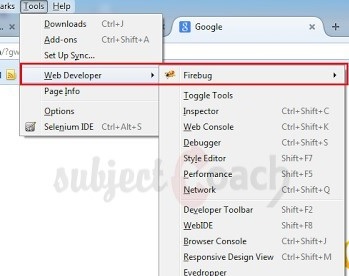
Step 3: Now, we can open the plugin by: Go to "Web Developer" Select "Firebug" as shown:
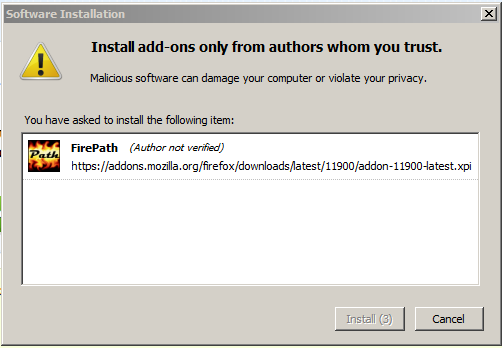
Step 4: FirePath, a plugin that helps to find the 'XPath' of an element. To Install FirePath by navigating to "https://addons.mozilla.org/en-US/firefox/addon/firepath/".
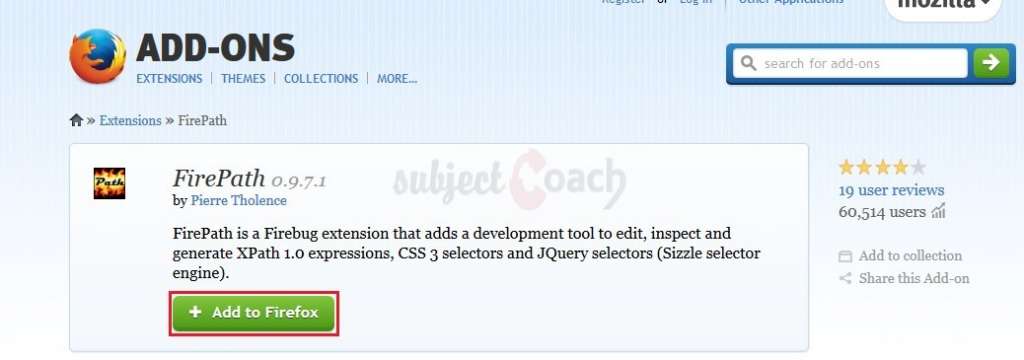
Step 5: Now the add-on installer is shown, click 'Install' button to install add-on.
Step 6: Now open "Firebug" by: Go to "Tools" click "Webdeveloper" click "Firebug".

Configure Selenium RC:
To configure Selenium Remote control and how to develop scripts with Selenium RC, follow below steps.
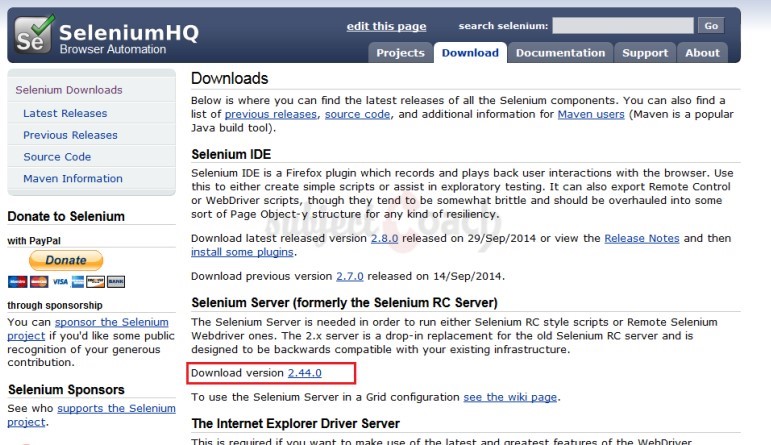
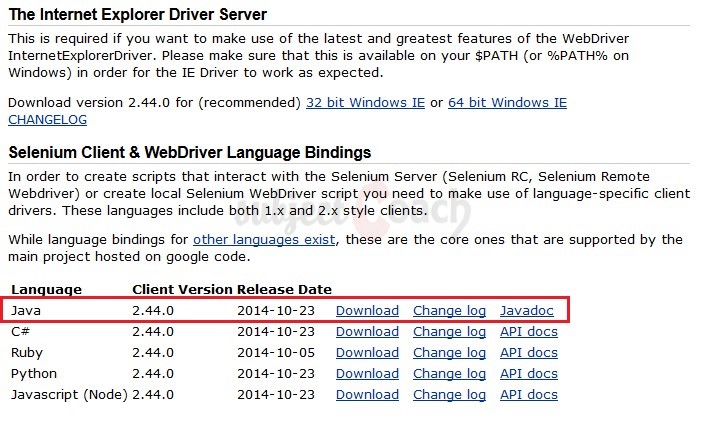
Step 1: Go to the URL: http://www.seleniumhq.org/download/ and to download Selenium Server, click on its version number as shown.
Step 2: Click on “save file”.
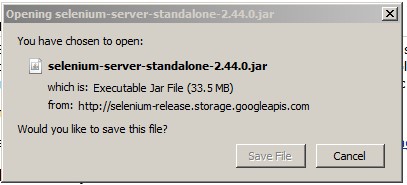
The selenium-RC jar file look like as shown below:
![]()
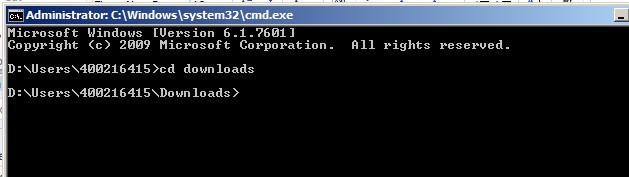
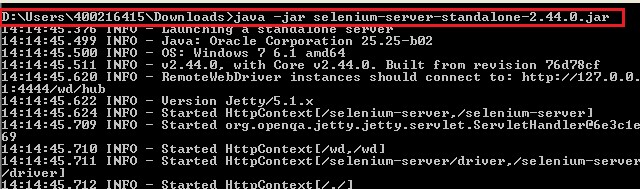
Step 3: To start the Selenium Server, open command prompt and navigate to the folder where the downloaded JAR file is saved.
Step 4: Using the command 'java -jar downloaded jar name to start the RC server and if java JDK is installed properly, you would get a success message as shown.

Configure Selenium WebDriver:
To configure Selenium Remote control and how to develop scripts with Selenium WebDriver, follow below steps.
- Step 1: follow the URL: http://www.seleniumhq.org/download/ and to download Selenium WebDriver click on its version number.
- Step 2: Click on “save file” button.
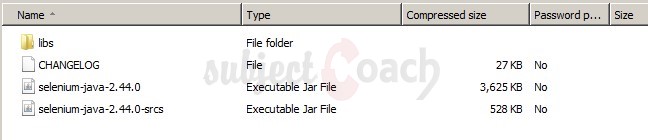
- Step 3: The download file will be in Zipped format. Unzip the file
- Step 4: The Unzipped file structure will be displayed as shown.
In next chapter we will learn about Selenium RC
Description
This tutorial will get you started with Selenium. This tutorial is subdivided into 11 chapters.
- Overview
- IDE
- Environment Setup
- Remote Control
- Selenese Commands
- Webdriver
- Locators
- User Interactions
- Test design techniques
- TestNG
- Grid
* freelancer contributed
Environment
A PC capable of running selenium
Prerequisites
A basic idea of what Software Testing is.
Audience
People who wish to get started with Selenium
Learning Objectives
You will learn ins and outs of Selenium which includes downloading, installing and using Selenium.
Author: Subject Coach
Added on: 10th Feb 2015
You must be logged in as Student to ask a Question.
None just yet!