Getting started with Selenium
Chapters
Getting stated with Selenium Webdriver
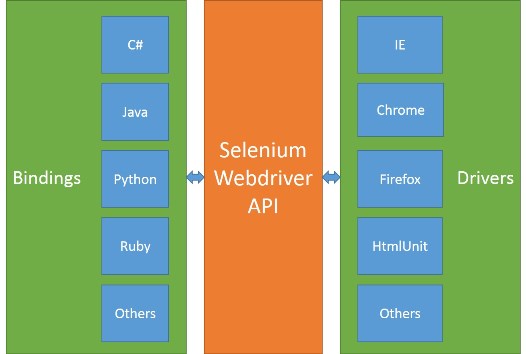
WebDriver is a web automation framework that allows you to execute tests against different browsers, not just Firefox (unlike Selenium IDE). WebDriver comes as an extended version to Selenium RC with advantages and many of its limitations. WebDriver also doesn’t require Selenium server to be started prior to execution of the test scripts unlike Selenium RC. It is used in the following context:
- Supports for handling multiple frames, multiple browser , popups, and alerts.
- Supports for Complex page navigation and advanced user navigation such as drag-and-drop.
- AJAX-based UI elements.
WebDriver Architecture:
WebDriver is a object oriented framework that works on OS layer. It uses the browser’s native compatibility to automation without using any peripheral entity.
Architecture of WebDriver is as shown.
Selenium RC Vs WebDriver:
Below diagram shows the main difference of RC and Webdriver:
|
Selenium RC |
Selenium WebDriver | |
|
Selenium RC’s architecture is way more complicated. |
Web Driver’s architecture is simpler than Selenium RC’s. |
|
|
Selenium Core, just like other JavaScript codes, can access disabled elements. |
Web Driver interacts with page elements in a more realistic way. |
|
|
Selenium RC needs the help of the RC Server in order to do so. |
Web Driver directly talks to the browser. |
|
|
It is less object-oriented API. |
It is purely object oriented API. |
|
|
It supports to test iPhone/Android applications. |
Scripting using WebDriver:
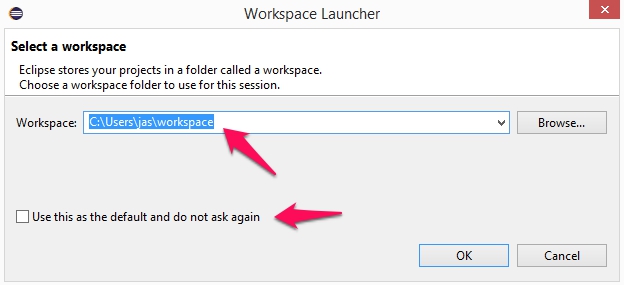
Step 1: Launch the “eclipse.exe” file from the extracted Eclipse folder.
Once you open the “eclipse.exe” file then select the workspace, here you can select the path where you want to save Eclipse project.
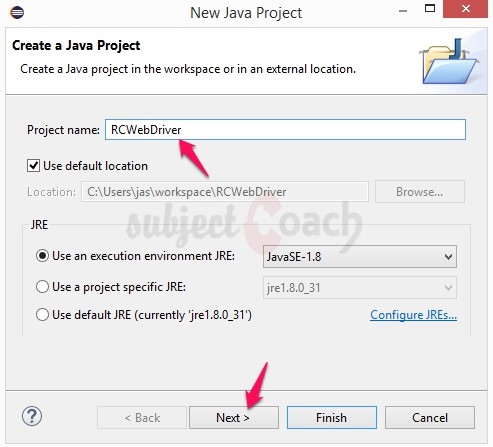
Step 2: To create a Java Project:
- Go to file “menu” select “New” select “Java Project”.
- Enter Project Name.
- Click on Finish button.
Step 3: To import external Selenium Jar files:
- Right click on “Selenium_webdriver_project” and select “Configure Build Path” option.
- Click on Libraries tab
- Click on “Add External JARs…” button.
- Select the extracted Selenium Java Client Driver folder downloaded and add all JAR files present in the inside & outside of the “libs” folder and click on OK in the Properties dialog box to import.
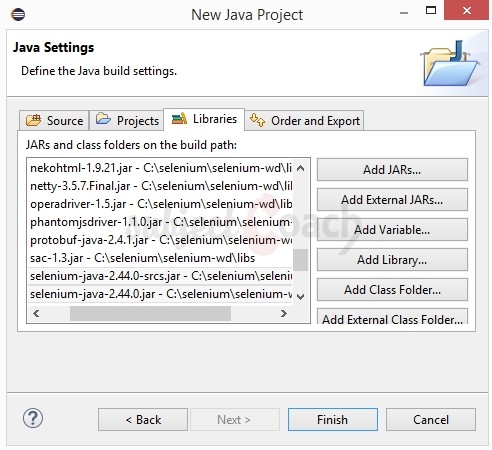
Once select these JAR files then your properties folder will look like as shown above.
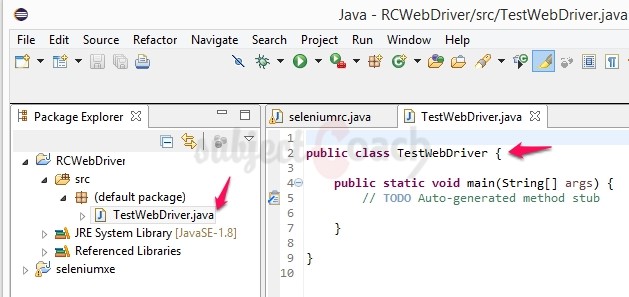
Step 4: To create a Class under Java project:
- Under newly created project “Selenium_webdriver_project” we will see the “src“ folder, right click on the “src” folder and create the new class as “TestWebDriver”.
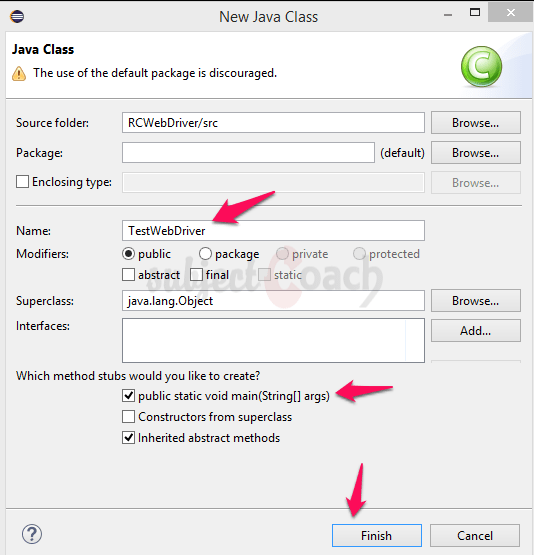
- After creation of the class, we will see the Eclipse screen like this.
- Step 5: Now we start coding. The following script is easier to understand, as it has added comments in it to explain the steps clearly. To run this Selenium WebDriver script, press CTRL+F11
Result of above execution will produce this resultimport java.util.concurrent.TimeUnit; import org.openqa.selenium.*; import org.openqa.selenium.firefox.FirefoxDriver; public class TestWebDriver { public static void main(String[] args) { WebDriver driver = new FirefoxDriver(); // Wait for 5 seconds before throwing exception driver.manage().timeouts().implicitlyWait(5, TimeUnit.SECONDS); // launch xe.com home page driver.navigate().to("http://www.xe.com/"); //To maximize the window driver.manage().window().maximize(); // To get the value of from_var hidden field String result = driver.findElement(By.xpath("//input[@id='from_var']")).getAttribute("value"); // Finally print the result System.out.println("from_var holds : " + result); // Close the session driver.close(); } }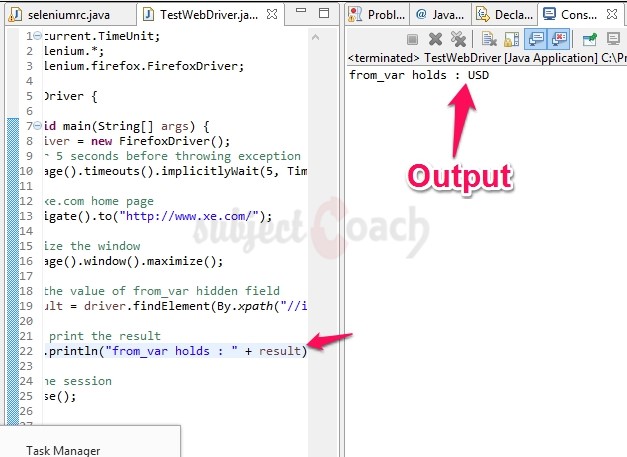
Most Used Commands:
The most frequently used commands in WebDriver along with their syntax.
|
Command |
Description |
|
element.clear() |
To clear the content of text box |
|
driver.get("URL") |
To navigate to a window |
|
element.sendKeys("inputtext") |
To enter some text into an input box |
|
select.deselectAll() |
Deselect all OPTIONs from the first SELECT on the page. |
|
driver.close() |
To closes the current browser. |
|
driver.quit() |
Quits the driver and closes all the associated window of that driver. |
|
driver.refresh() |
To refresh the current page |
|
driver.switchTo().window("windowName") |
To switch from one window to another |
|
driver.switchTo().frame("frameName") |
Swing from frame to frame. |
|
driver.switchTo().alert() |
To handling alerts |
|
driver.navigate().back() |
To navigate back |
|
driver.navigate().forward() |
To navigate forward |
|
select.selectByVisibleText("text") |
Select the OPTION with the input specified by the user. |
Description
This tutorial will get you started with Selenium. This tutorial is subdivided into 11 chapters.
- Overview
- IDE
- Environment Setup
- Remote Control
- Selenese Commands
- Webdriver
- Locators
- User Interactions
- Test design techniques
- TestNG
- Grid
* freelancer contributed
Environment
A PC capable of running selenium
Prerequisites
A basic idea of what Software Testing is.
Audience
People who wish to get started with Selenium
Learning Objectives
You will learn ins and outs of Selenium which includes downloading, installing and using Selenium.
Author: Subject Coach
Added on: 10th Feb 2015
You must be logged in as Student to ask a Question.
None just yet!