Quick Test Professional - The starters Guide
Chapters
Working with Test Results
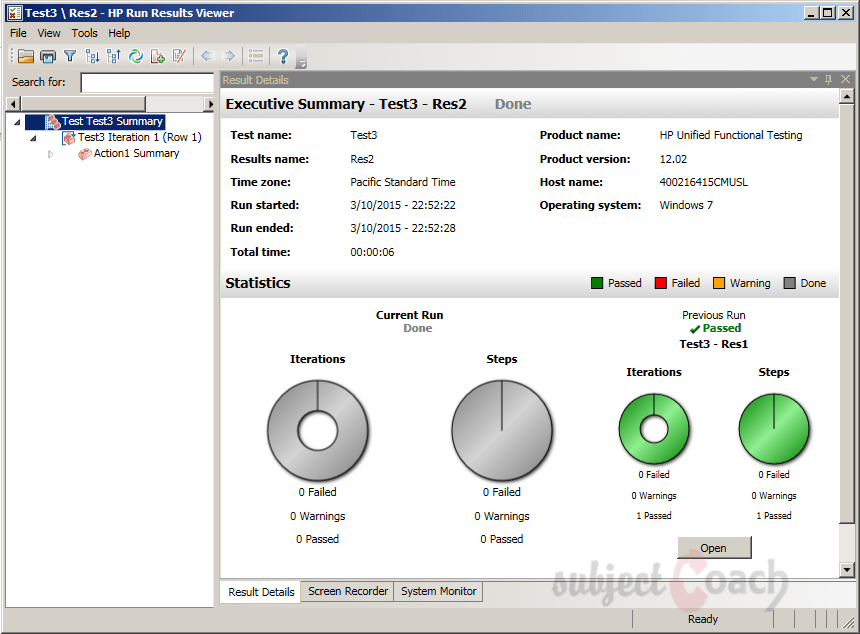
After running the test, we can view the result in the Test Results window. The Test Results tab opens automatically when a run session is completed.
The Test Results tab gives us all necessary information to show the steps passed, failed etc.
- Environment Parameters
- Steps Passed
- Graphical Statistics
- Steps Failed
By default, after we run any QTP script, QTP will automatically display test result window after the execution of script is finished.
In order to open the QTP test result window at any time go to "Automation->Results" or Test Results Viewer from start menu
Test Results Operations are:
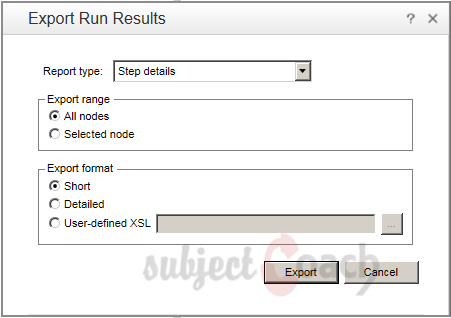
Converting Results to HTML:
In the Results Viewer window, go to "File" click "Export to File", Export Run Results dialog box.
We can select the type of report to be exported.
Types of Report:
- Detailed Results
- Short results or
- User-defined XSL which is enables to browse and also to select a customized .xsl file.
Once Selecting the File Name and after exporting it, the file will be saved as .HTML Fil
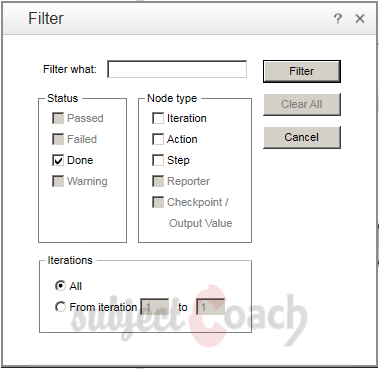
Filtering the Results:
Filtering of Results based on below status,
- Node
- Iteractions
Filtering can be accessed by using Filter Button in the "Test Results Window" as shown below:
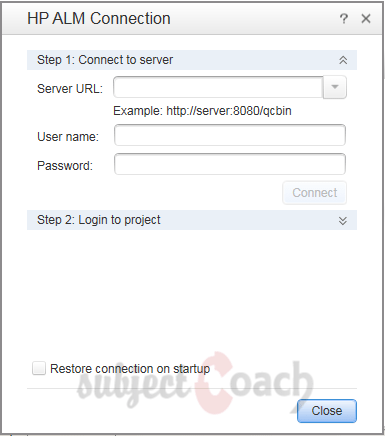
Raising Defects:
To log Defects into QC directly from the Test Results Window follow below steps:
"Tools" select "Add Defect" which open's connection to ALM.
Test Results:
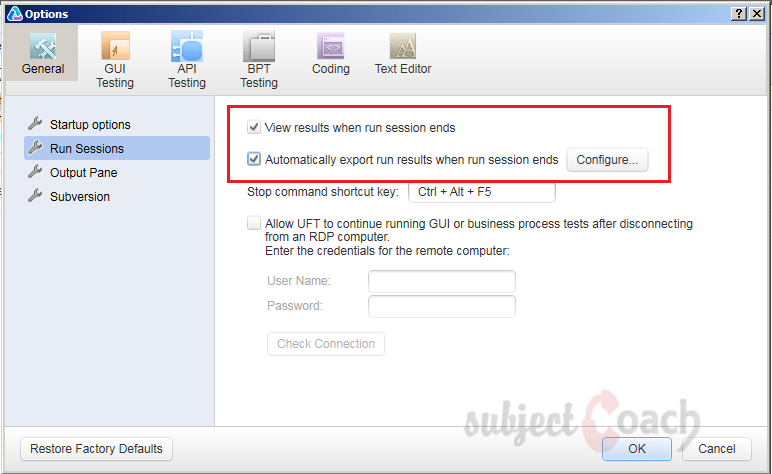
To configure the Automatic Test Results Window:
"Tools" select "Options" select "Run Sessions" Tab. We can turn on/off and if it is ON "Automatically Export Results when session ends as shown below:
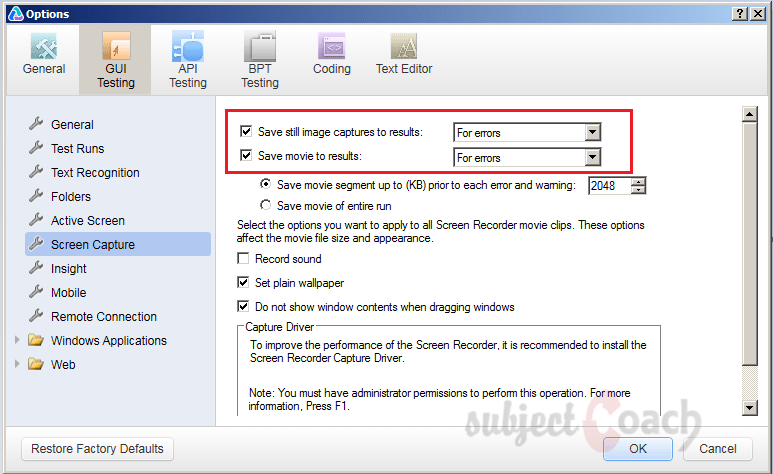
When there are Errors, we can recorded the screenshot, the settings are.
Go to"Tools" select "Options" select "Screen Capture" Tab.
The constraints to save the screenshot are:
- For Errors
- Always
- For Errors and Warnings
In next part we will check out GUI objects
Description
In this tutorial, we will get to know Quick test professional. At the time of writting QTP is at version 12.2. This tutorial is subdivided into multiple parts as shown below
- What is QTP
- Automating tests
- Environment
- Recording and Playback
- Object Repository
- Actions
- Data Table
- Checkpoints in QTP
- Synchronization
- Smart Identification
- Debugging and Error handling
- Recovery Scenarios
- Environment Variables
- Library Files
- Test Results
- GUI Objects
- Virtual Objects
- Accessing Databases
- Working with XML
- Descriptive Programming
- Automation Object Model
- A work on Frameworks
Leave your feedback for us, Feedback help us improve our tutorials.
Prerequisites
Some knowledge on Windows OS and VB Script is recommended
Audience
Students who wish to learn QTP
Learning Objectives
Learn QTP
Author: Subject Coach
Added on: 16th Mar 2015
You must be logged in as Student to ask a Question.
None just yet!