Quick Test Professional - The starters Guide
Chapters
Object Repositories
An object repository is a storehouse for the test objects (and other object types) and properties used in the test. During recording process under test, all objects and its properties records, automatically.
Without these objects and properties, UFT could not play back the scripts. Run time objects are stored representations objects values and properties, used by UFT to run the test.
Types of Object Repository:
- Shared object repositories
- Local object repositories
Shared object repositories:
Test objects store in this repositories used by multiple actions, it defined as object is shared across actions/modules which would be mapped for two or more actions.
If any changes we do with an object of a shared object repository, will automatically reflect to all steps of the action to which object is associated.
Local object repositories:
Objects stored in this type of repository cannot be used in any other action. The Test objects that store in these repositories used in one specific action.
Difference between Local Object Repository and Shared Object Repository are:
|
Local Object Repository(LOR) |
Shared Object Repository (SOR) |
|
The LOR can be modified in Object Repository. |
It is read only by default, but can be modified in Object Repository Manager. |
|
Difficult to edit, because it is not a standalone file. |
Easy to edit, because it is a standalone file. |
|
It should be used when many tests does not work on the same screens of the application under test. |
It should be used when different scripts interact with the same type of the object. |
|
This Object Repository is available one for each action. |
This type of OR is available for multiple tests and for multiple actions. |
|
It uses .bdb extension for file saving.
|
It uses .tsr extension for file saving.
|
Object Spy:
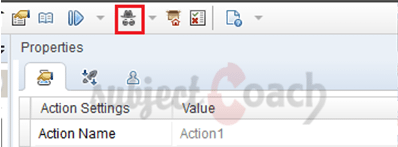
Object Spy is used to add objects to the Object Repository. Object Spy can be accessed from the tool bar, as shown.
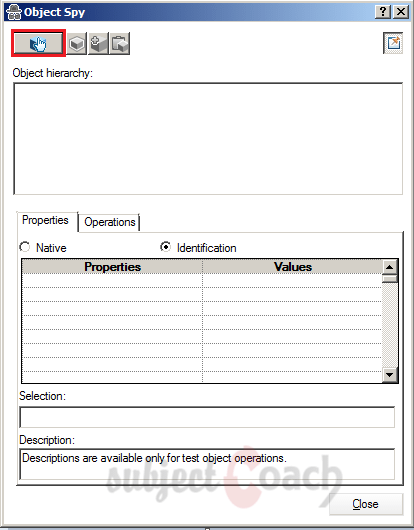
Click on the Object Spy icon, the Object Spy Dialog box opens. Now, click on pointing hand icon to add objects in the repository.
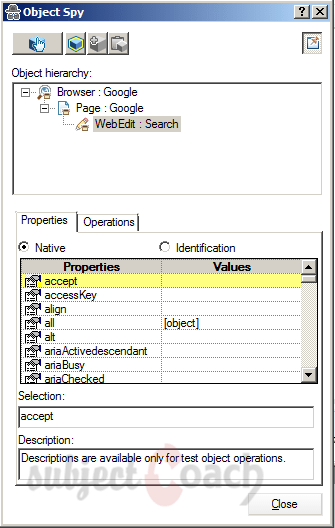
After spying the object, Object Spy displays the object hierarchy with the Object_Class and Object_Name, and also displays the properties and values of the object shown.
Click on "Highlight", it will take you to that particular object of the application. The highlighted part of the application comes once clicking on "Highlight" option as shown below.
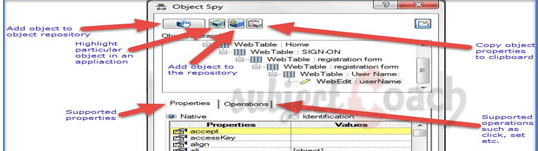
To add the object into the Object Repository, Click on “Add objects” button in the Object spy dialog.
Properties and values display of particular object in the dialog box should be unique for UFT to identify the objects while the script executes.
Adding Objects into OR:
Once spying the object, Clicking on "Add Objects to OR", the objects are added into Object repository. The Script can execute successfully only if the objects are added into the Object Repository.
Record some actions on the object; this will automatically add this object to the object repository.
Object Repository - Features:
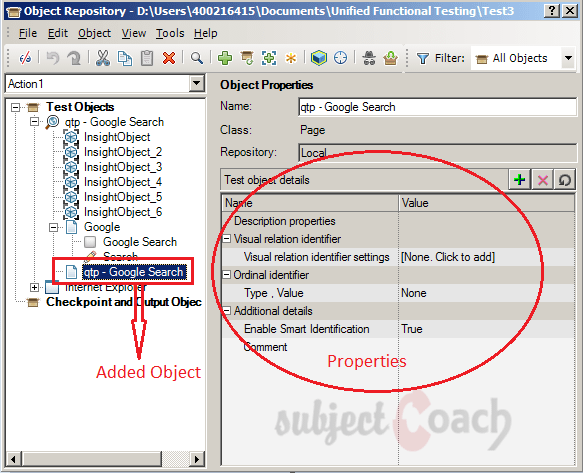
To verify the added objects: go to "Resources" click on "Object Repository". The Object Repository Window opens and we can locate the added object in the Repository as shown below:
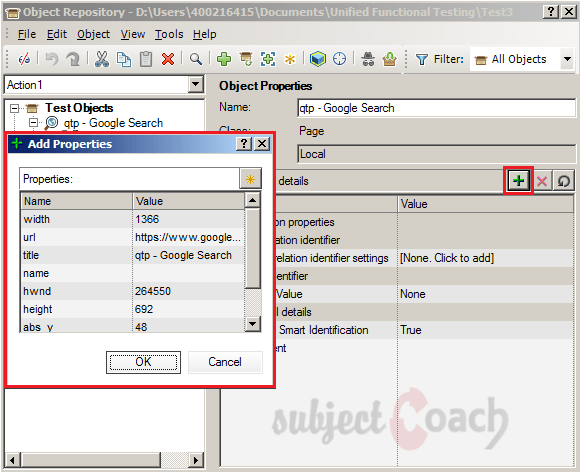
User can add the properties additionally apart from the default ones,
By clicking on "+" button, to remove it, use "x" button and to restore to defaults we can click on the "circular arrow" button as shown below.
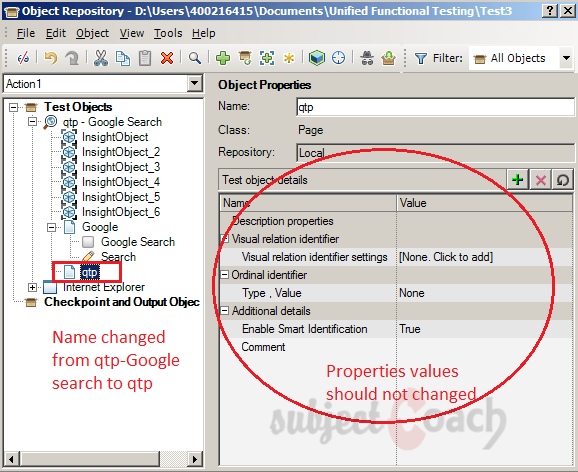
To change the object's Name. The name of the object is "Numbers" that can be renamed to "Num" which will NOT have any effect on identifying the object uniquely. Only the Object's Name can be changed and NOT it’s Properties.
Note: If there is a change in logical name, the same name should be used while scripting.
Object properties must be unique so that QTP will be able to recognize the objects and act on it. If the object properties are same for two or more objects then runtime error would be thrown that "More than one object is matched for the specified properties".
Once the object added, it can be used in script by drag-drop as shown below.
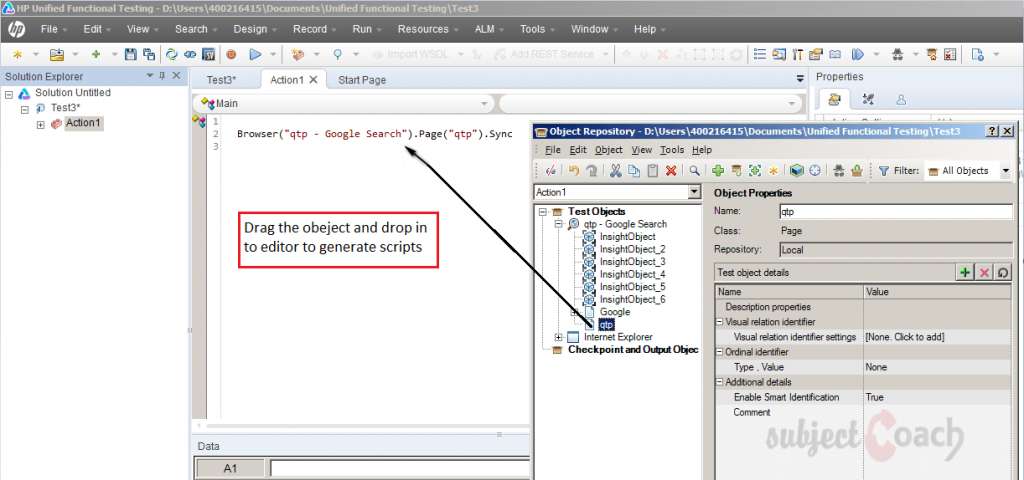
When the object is dragged and dropped, the default operation is set. Ex: Click for a button, Set for a Text Box etc.
User Defined Objects:
All Objects are NOT recognizable by QTP if incase the application does NOT use Standard Windows Classes. In UFT interface uses Class Name to identify the type of Object and sometime these objects can be shown as a button or Combo Box etc.
When we add the button object displays as Winobject.
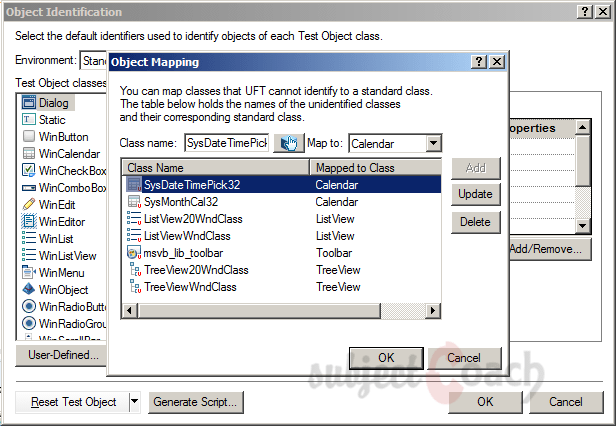
To get this WinObject, go to Tools click on Object Identification.
Once Object Identification dialog box opens, from Environment drop down box select “Standard Windows” then click on “User Defined” button.
Note: This option won’t work against any other environment.
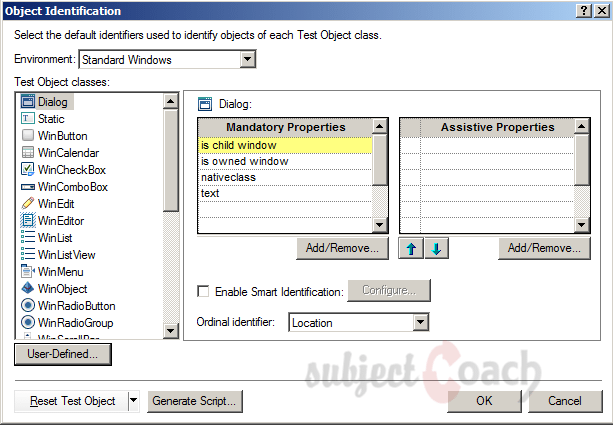
In the below example, an object of a specific class is made to identify as an object of Type "button". Hence this object inherits all properties of a button and we can use the objects that are supported by button.
Save Object Repository into XML format:
To reduce the size of Object Repository, save it in XML format. Here user can export and import same or different object repository into XML format, using this process.
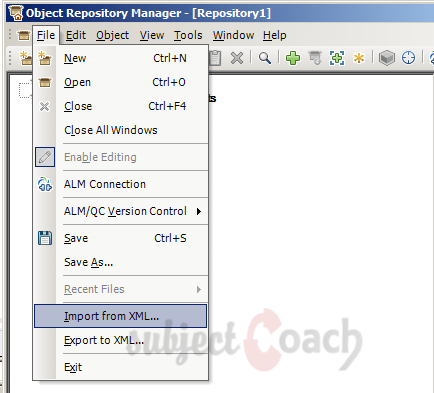
Open Shared object Repository Window, go to File select "Export to XML" or "Import to XML" as shown below,
Compare Object Repositories using Comparison Tool:
Comparison is helpful for users to see two different object repositories objects, properties and their values, to decide which repository is helpful for test.
Object repositories can be compared using Object Repository Comparison Tool.
Go to "Resources" select Object Repository Manager.
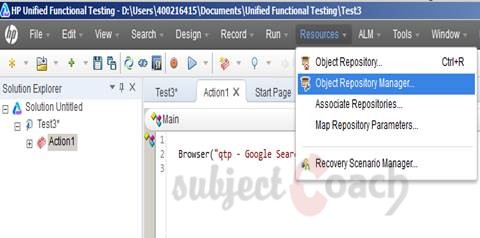
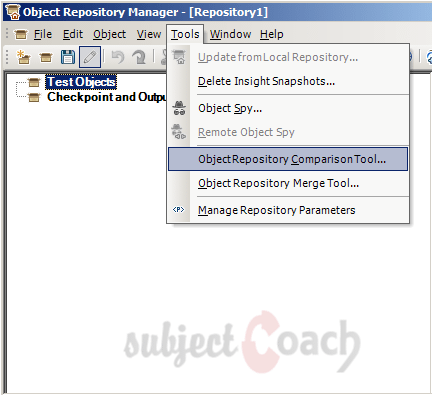
Object Repository Manager Window opens, click on Tools select "Object Repository Comparison Tool".
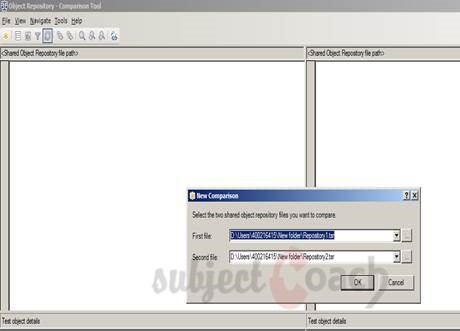
The Object Repository comparison Window opens, here user has to choose two Object Repository files for comparison and click on OK.
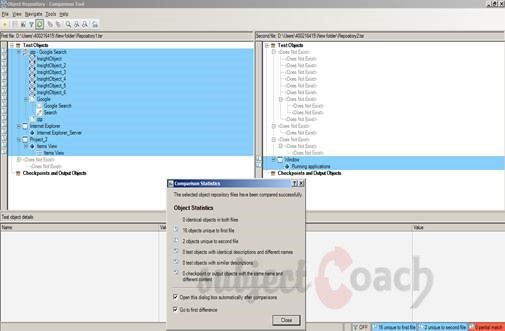
It shows the Comparison and displays the differences one by one as shown below.
Close the "Comparison Statistics".
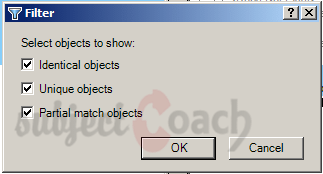
Now, Click on “Filter” button. Filter dialog box opens with three parameters-
- Unique objects
- Identical objects and
- Partial match objects.
Confirm that all three options should be selected.
Merging Object Repositories:
Some time, it becomes necessary to merge object repositories with each other. In this case, object repository adds additional overheads.
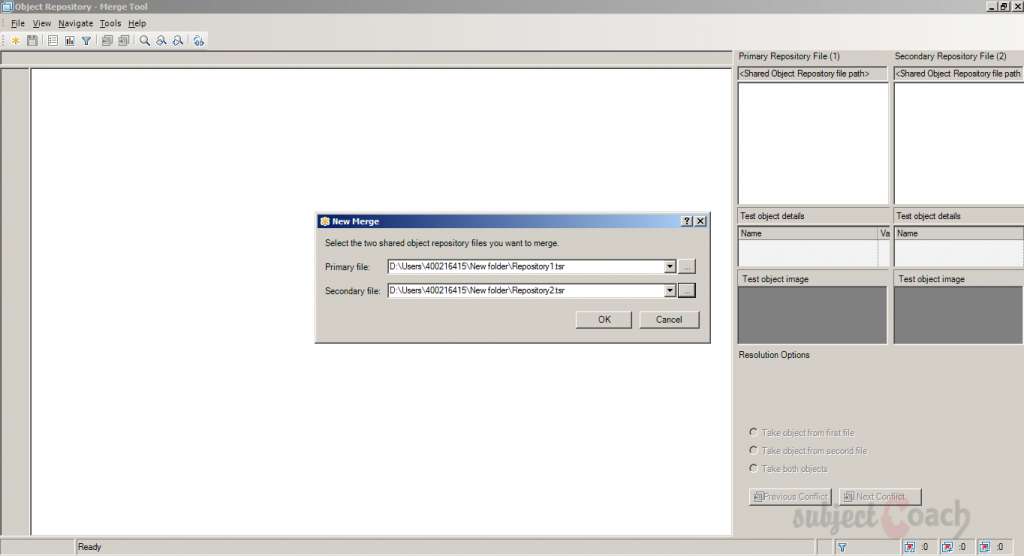
Go to Resources select Object Repository Manager. Once opened Object Repository Manager window, select Tools then click on Object Repository Comparison Tool.
Now, select two Object Repository files for merge and click OK
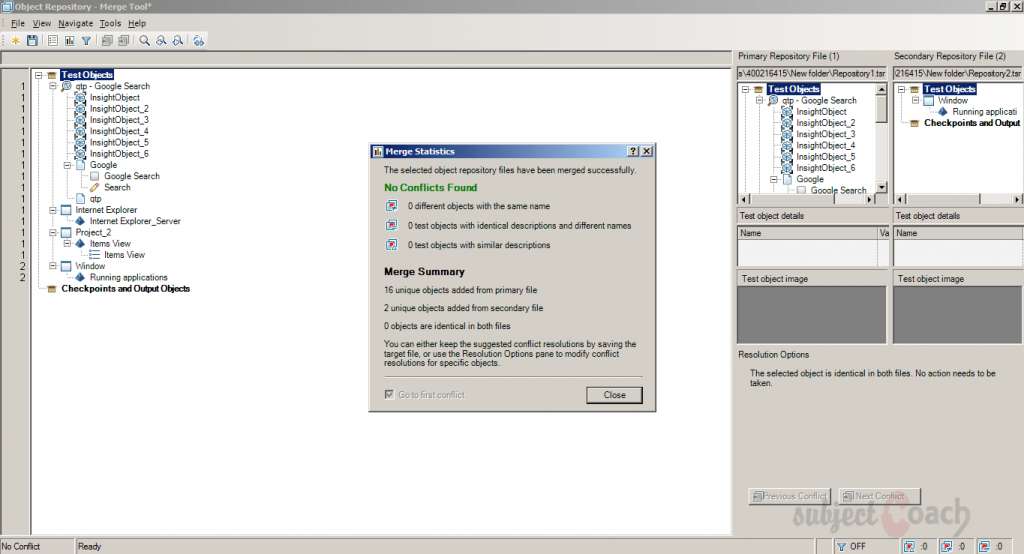
Merge Statistics shows with conflicts and merge summary, as shown below. Close the Merge Statistics dialog box.
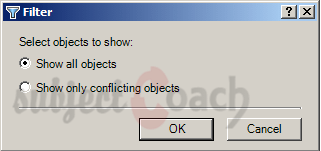
Even one can filter based on 2 parameters:
- Show all objects
- Show only conflicting objects.
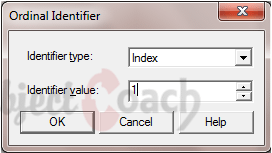
Ordinal Identifiers:
In some situation, we get series of objects with same class name and properties. Suppose, UFT window has series of check boxes with the same set of properties and user wants to work on those objects, first they have to uniquely identify them then only UFT will be able to act on it.
An Ordinal Identifier works; it gives a numerical value to test objects that specifies its location or order in a group. This value helps UFT to identify objects when the inbuilt properties are NOT sufficient to do so.
Three Ordinal Identifiers, which supports by UFT
- Index: It is based on the appearance order an object in the code
- Location: It is based on the location in a screen or dialog or page
- Creation Time: This is used for objects of browser.
Example:
First appearing object in the Window will have a smaller Index value when compared to another object that comes later in the same Window.
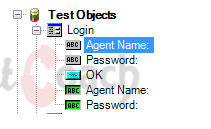
Index value of Text boxes will be as shown below
For static text identifier as 0
For the editbox 1
The output:

To refer the static text: WinObject(“text:=Agent Name:”, index:=0)
To refer the Edit box: WinObject(“text:=Agent Name:”, index:=1)
Child Objects:
The objects like text box, combo box, links contained in the Window is known as child objects.
Many at times in Scripting we come across scenarios where we need to count the objects in the application or even highlight a child object like highlighting a text box or check and uncheck check boxes using scripting in QTP.
Below script the example to get all the name of the links from the website http://www.google.com/
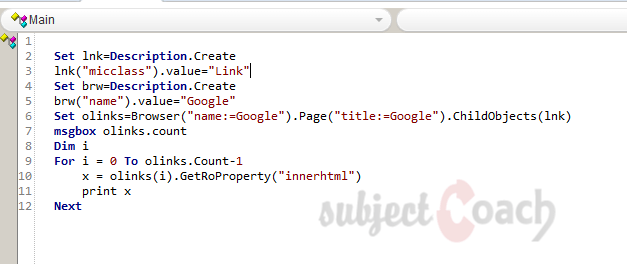
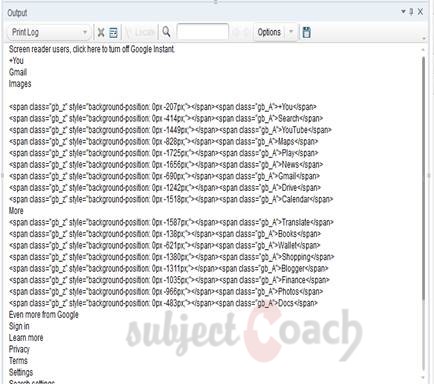
The Result in the output window as shown below:
Description
In this tutorial, we will get to know Quick test professional. At the time of writting QTP is at version 12.2. This tutorial is subdivided into multiple parts as shown below
- What is QTP
- Automating tests
- Environment
- Recording and Playback
- Object Repository
- Actions
- Data Table
- Checkpoints in QTP
- Synchronization
- Smart Identification
- Debugging and Error handling
- Recovery Scenarios
- Environment Variables
- Library Files
- Test Results
- GUI Objects
- Virtual Objects
- Accessing Databases
- Working with XML
- Descriptive Programming
- Automation Object Model
- A work on Frameworks
Leave your feedback for us, Feedback help us improve our tutorials.
Prerequisites
Some knowledge on Windows OS and VB Script is recommended
Audience
Students who wish to learn QTP
Learning Objectives
Learn QTP
Author: Subject Coach
Added on: 16th Mar 2015
You must be logged in as Student to ask a Question.
None just yet!