Working with TestNG - Starters Guide
Chapters
Setting up and testing the Environment
TestNG framework is for Java so make sure that JDK installed and also eclipse because we are using eclipse to work with TestNG.
Install Java Software Development Kit (SDK) from below link http://www.oracle.com/technetwork/java/javase/downloads/index.html
To set environment for Java:
Set the JAVA_HOME environment variable to the base directory location where Java is installed.
For windows to set the environment variable JAVA_HOME: C:\ProgramFiles\Java\jdk1.8.0_25
For Linux Export JAVA_HOME=/usr/local/java-current
For MacExport JAVA_HOME=/Library/Java/Home
To add Java compiler location to System Path:
For windows add the path C:\Program Files\Java\jdk1.8.0_25\bin at end of system variable Path by putting semicolon at the end. Do not delete/edit old path.
For Linux Export PATH=$PATH:$JAVA_HOME/bin/
For Mac not required
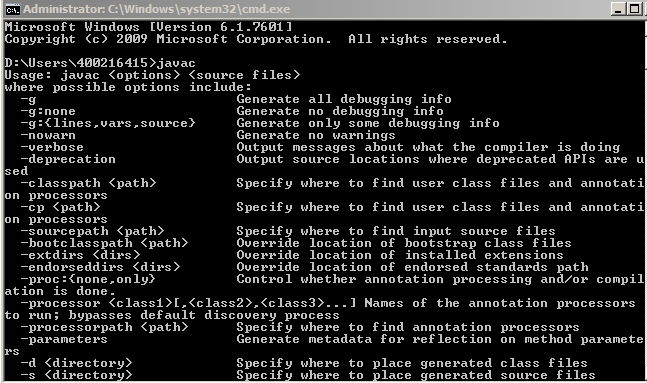
To verify Java Installation using the command javac:
Go to command prompt and type the command javac you should get this out if java is successfully installed.
Here in eclipse we are enabling TestNG. We can also execute JUnit test outside the eclipse that is discussed in future topics.
Steps to enable TestNG in eclipse:
Note: TestNG is not built in eclipse
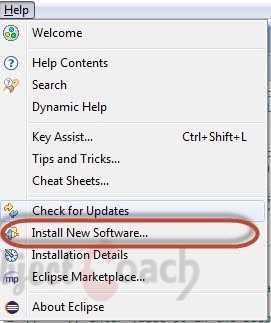
In order to install TestNG follow below steps:
- Go to help in eclipse, click on Install New software
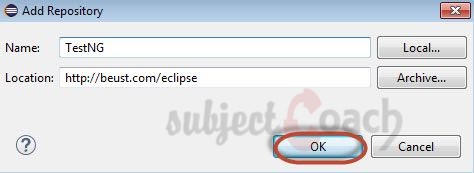
- To start installation process, click the Add button as shown:

- Now enter the name as TestNG and in the "Location", type the URL: http://beust.com/eclipse, click ok button:
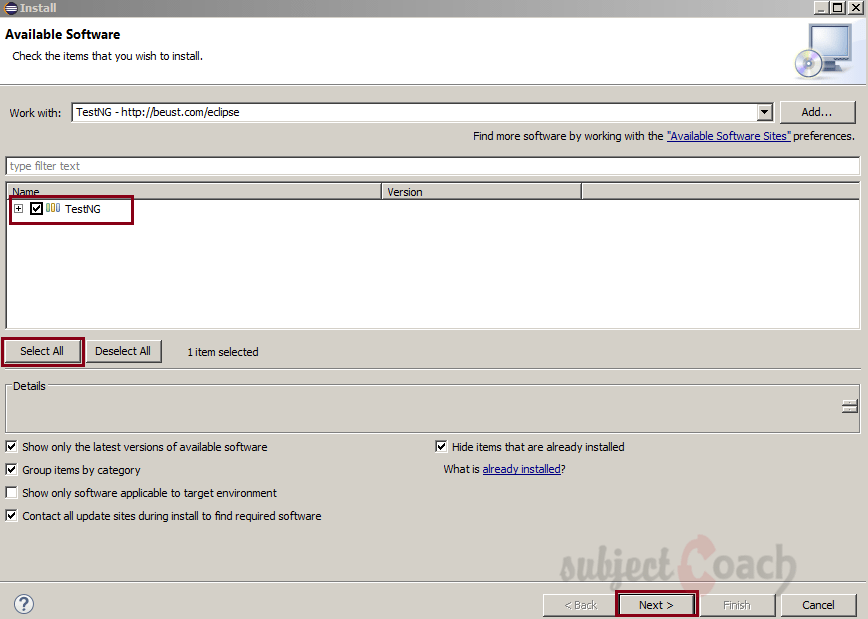
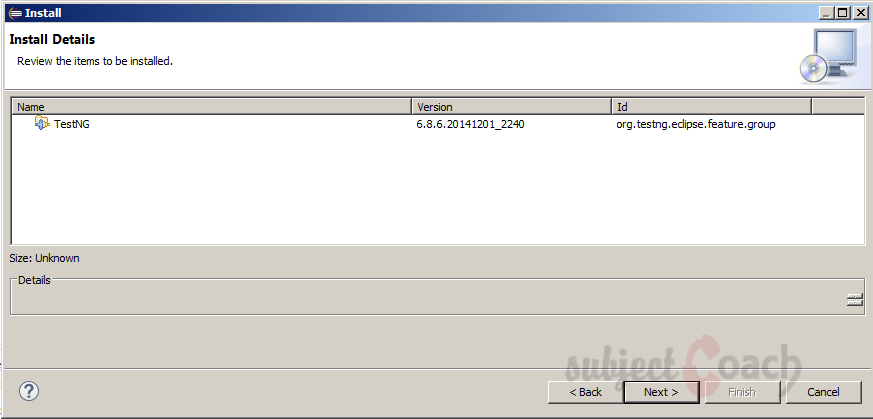
- Click “Select All”, then check the “TestNG” then click “Next”:
- Click 'Next' to begins the installation process:
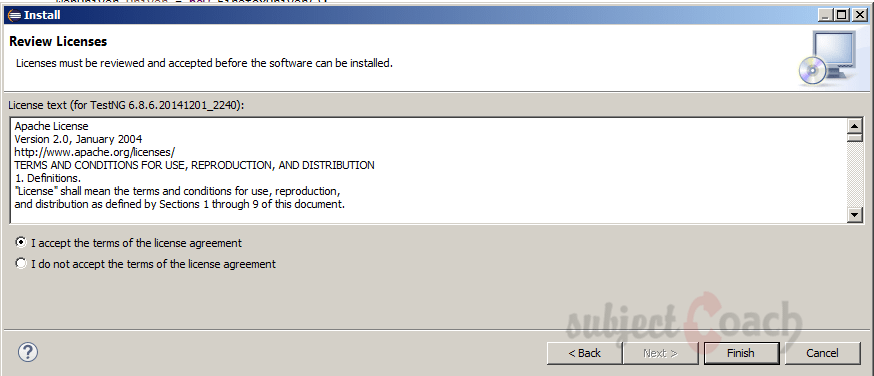
- Here click the radio button "I accept the terms of the license agreement" and then click Finish button.
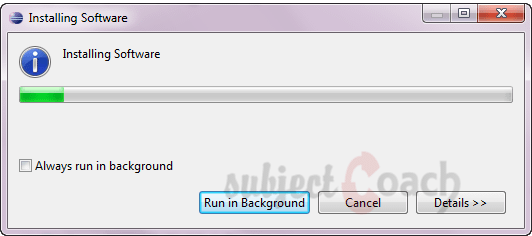
- Now the installation process starts ,Wait for the installation to finish
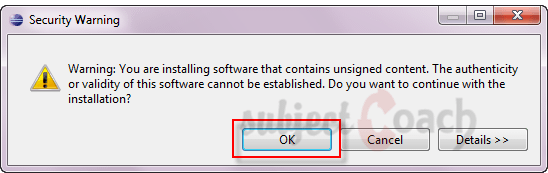
- We will get Security warning dialog box, click OK
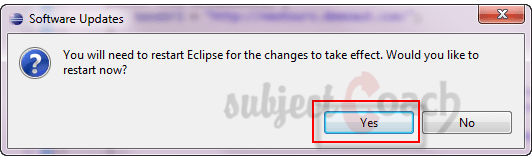
- Software Updates dialog box will pop-up to restarteclipse, click "Yes".
Verify the setup of TestNG
To verify the setup of TestNG:
- Creating a java class file named classA at C:\>Users\testng\workspace.
package TestNG; import org.TestNG.annotations.Test; import staticorg.TestNG.Assert; public class classA {@Test publicvoid method1() { System.out.println("inside the method1"); String msg = "Welcome to TestNG"; assertEquals("Welcome to TestNG", msg); } } - Run the above program by clicking on Run button of eclipse.
Ouput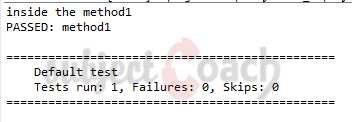
Description
This tutorial is focused on getting you started on TestNG, the testing framework inspired from JUnit and NUnit. Here is a quick table of contents
- What is TestNG?
- Environment Set-up
- Writing Tests
- Basic Annotations
- Execution Procedure
- Executing Tests
- Suite Test
- Ignore Test
- Group Test
- Exception Test
- Dependency Test
- Parametrized Test
- JUnit Tests
- Test Reports
- Running tests without Eclipse
- Plugin with ANT
Environment
A computer capable of running Java. IntelliJ Community IDE is also required for this course.
Prerequisites
Good knowledge of Java programming language and eclipse is essential.
Audience
Students looking to get started with TestNG
Learning Objectives
This tutorial will get you started with TestNG.
Author: Subject Coach
Added on: 12th Mar 2015
You must be logged in as Student to ask a Question.
None just yet!