Working with TestNG - Starters Guide
Chapters
Parameterized Test
By using TestNG Parameters and data provider user can Parameterized tests to run the same test multiple times using different values.
TestNG Parameters:
By using TestNG Parameters user can define the parameters in the testng.xmlfile and then reference those parameters in source files.
Create a Class:
Create a class named as TestNGParameters.java
package testNG;
import org.testng.annotations.Parameters;
import org.testng.annotations.Test;
public class TestNGParameters {
@Test@Parameters("message")
public void testParam(String message) {
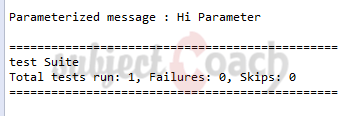
System.out.println("Parameterized message : " + message);
}
}
Create testing.xml file as shown below.
<?xml version="1.0" encoding="UTF-8"?>
<suite name="test Suite">
  <test name="Parameter Example">
    <parameter name="message" value="Hi Parameter"/>
    <classes>
       <class name="testNG.TestNGParameters"/>
    </classes>
  </test>
</suite>
Run the testing.xml file by click on run button in eclipse.
The output is shown below
TestNG will convert automatically the specified value in testng.xml to the type of parameter. The types supported are:
- int/Integer
- long/Long
- float/Float
- double/Double
- byte/Byte
- boolean/Boolean
- String
- char/Character
- short/Short
TestNG Data Providers:
A DataProvider is a method annotated with @DataProvider which returns an array of objects.
Complex objects,objects read from a property file or a database etc. in such cases parameters can be passed using Dataproviders.
Example 1:
Create a Class:
Create a class named as EvenOrNot.java
package testNG;

public class EvenOrNot {
	public boolean evenNumb(final Integer number) {

		if (number % 2 == 0) {
			return true;
		}
		return false;
	}
}
Create Test Case Class:
import org.testng.annotations.Test;
public class DataProvidersExample {
EvenOrNot ev = new EvenOrNot();
@DataProvider(name = "even1")
public static Object[][] EvenOrNot() {
return new Object[][] {
{
2, true
}, {
7, false
}, {
10, true
}, {
3, false
}
};
}
@Test(dataProvider = "even1")
public void evenNumbChecker(Integer input, Boolean expected) {
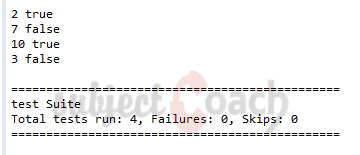
System.out.println(input + " " + expected);
Assert.assertEquals(expected,
ev.evenNumb(input));
}
}
Create testing.xml file as shown below
<?xml version="1.0" encoding="UTF-8"?>
<suite name="test Suite">
   <test name="DataProviders Example">
    <classes>
       <class name="testNG.DataProvidersExample"/>
    </classes>
   </test>
</suite>
Run the testing.xml file by click on run button in eclipse.
The Output is:
Example 2:
Create a Class:
Create a class named as EvenOrNot.java
package testNG;

public class StudentDetails {
	private String student_Name;

	//to return the name

	public StudentDetails(String student_Name) {
		this.student_Name = student_Name;
	}

	public String getName() {
		return student_Name;
	}

	// parameter  student_Name the student_Name to set

	public void setName(String student_Name) {
		this.student_Name = student_Name;
	}
}
Create Test Case Class:
package testNG;

import org.testng.annotations.DataProvider;
import org.testng.annotations.Test;

public class DataProvidersExample {

	@DataProvider(name = "studentName")
	public static Object[][] EvenOrNot() {
		Return new Object[][] {
			{
				new StudentDetails("Robin")
			}
		};
	}

	@Test(dataProvider = "studentName")
	public void method1(StudentDetails stud) {
		System.out.println("Student Name is :" + stud.getName());

	}
}
Create testing.xml file as shown below.
<?xml version="1.0" encoding="UTF-8"?>
<suite name="test Suite">
 <test name="DataProviders Example2">
   <classes>
     <class name="testNG.DataProvidersExample"/>
   </classes>
 </test>
</suite>
Run the testing.xml file by click on run button in eclipse.
The Output is:

Description
This tutorial is focused on getting you started on TestNG, the testing framework inspired from JUnit and NUnit. Here is a quick table of contents
- What is TestNG?
- Environment Set-up
- Writing Tests
- Basic Annotations
- Execution Procedure
- Executing Tests
- Suite Test
- Ignore Test
- Group Test
- Exception Test
- Dependency Test
- Parametrized Test
- JUnit Tests
- Test Reports
- Running tests without Eclipse
- Plugin with ANT
Environment
A computer capable of running Java. IntelliJ Community IDE is also required for this course.
Prerequisites
Good knowledge of Java programming language and eclipse is essential.
Audience
Students looking to get started with TestNG
Learning Objectives
This tutorial will get you started with TestNG.
Author: Subject Coach
Added on: 12th Mar 2015
You must be logged in as Student to ask a Question.
None just yet!